How to send SMTP Email using a PowerShell

In this article I will explain you the configuration and script required to send SMTP Email. I configured it on Windows Server 2008 R2 with IIS 6.0.

Part 1 – Configure SMTP Server on the machine

Make sure Internet Information Services (IIS) is installed on your server. Next install the SMTP Server.

On your server, open Server Manager, right click on Features, click on the Add Features. In the Add Features Wizard, select the checkbox for SMTP server and install it

addfeatures


SMTPServer

Note – On my server it was already configured.

Open the IIS 6.0 Manager, open the properties for your SMTP Virtual Server.

SMTPProp


Click on the Relay button

relay

Add the IP address [127.0.0.1] for the localhost and click OK.

addlocal

Open the IIS Manager and double click on the SMTP E-mail.

smtpemail


Make sure the port no 25 is configured to send email for the your SMTP server (localhost).

smtpemail1

Open Windows Firewall with Adanvced Security and check the inbound rule for SMTP is enabled and showing port 25. If it is not there then created the rule.

firewallrule

Part 2 – Scripts for sending E-mail

To send email, I kept all my files (content.htm and sendmymail.ps1) in a folder c:\email

  • Content.htm

I wrote an HTML file called content.htm which has all the content text I need to send through SMTP email. The text was just 🙂

Hi Buddy,

How are you doing? Come join the party this weekend.

Cheers,

Vijay

  • sendmymail.ps1

The script for for Powershell have  .ps1 extention. Note that on my server powershell version 2.0 is configured. This file was created in notepad. The content of the file c:\email\contentSuccess.htm is as below:

###########Define Variables########

$fromaddress = “donotreply@sambhe.ie”
$toaddress = “abcdefg123455@gmail.com”
$Subject = “Hello There”
$body = get-content c:\email\content.htm

$smtpserver = “localhost”

####################################

$message = new-object System.Net.Mail.MailMessage
$message.From = $fromaddress
$message.To.Add($toaddress)
$message.IsBodyHtml = $True
$message.Subject = $Subject
$message.body = $body
$smtp = new-object Net.Mail.SmtpClient($smtpserver)
$smtp.Send($message)
$error[0]|format-list -force
################################################################

The syntax is understandable. The $body is pointing to the htm file. $smtpserver is pointing to localhost, From and To addressed are given, subject is entered.

  • Powershell syntax

Excecute the following command in the Command window.

Powershell.exe -executionpolicy remotesigned -File c:\email\sendmymail.ps1

The script above will send the email to abcdefg123455@gmail.com. This can be put in a batch file and configure as a scheduled task. You can make your processes automated e.g. run a process and send email to IT manager/Admin about the status of the execution etc.

If you already have a SMTP server in your network and you want to use it to send the email then in the .ps1 script $smtpserver should point to your standard SMTP server by its identifier (ip or host name). On your SMTP server though you need to add the IP address of this server in the Relay setting (shown above).


How to send SMTP Email using PowerShell

In this article I will explain you the configuration and script required to send SMTP Email. I configured it on Windows Server 2008 R2 with IIS 6.0.

Part 1 – Configure SMTP Server on the machine

Make sure Internet Information Services (IIS) is installed on your server. Next install the SMTP Server.

On your server, open Server Manager, right click on Features, click on the Add Features. In the Add Features Wizard, select the checkbox for SMTP server and install it

addfeatures


SMTPServer

Note – On my server it was already configured.

Open the IIS 6.0 Manager, open the properties for your SMTP Virtual Server.

SMTPProp


Click on the Relay button

relay

Add the IP address [127.0.0.1] for the localhost and click OK.

addlocal

Open the IIS Manager and double click on the SMTP E-mail.

smtpemail


Make sure the port no 25 is configured to send email for the your SMTP server (localhost).

smtpemail1

Open Windows Firewall with Adanvced Security and check the inbound rule for SMTP is enabled and showing port 25. If it is not there then created the rule.

firewallrule

Part 2 – Scripts for sending E-mail

To send email, I kept all my files (content.htm and sendmymail.ps1) in a folder c:\email

  • Content.htm

I wrote an HTML file called content.htm which has all the content text I need to send through SMTP email. The text was just 🙂

Hi Buddy,

How are you doing? Come join the party this weekend.

Cheers,

Vijay

  • sendmymail.ps1

The script for for Powershell have  .ps1 extention. Note that on my server powershell version 2.0 is configured. This file was created in notepad. The content of the file c:\email\contentSuccess.htm is as below:

###########Define Variables########

$fromaddress = “donotreply@sambhe.ie”

$toaddress = “abcdefg123455@gmail.com”

$Subject = “Hello There”

$body = get-content c:\email\content.htm

$smtpserver = “localhost”

####################################

$message = new-object System.Net.Mail.MailMessage

$message.From = $fromaddress

$message.To.Add($toaddress)

$message.IsBodyHtml = $True

$message.Subject = $Subject

$message.body = $body

$smtp = new-object Net.Mail.SmtpClient($smtpserver)

$smtp.Send($message)

$error[0]|format-list -force

################################################################

The syntax is understandable. The $body is pointing to the htm file. $smtpserver is pointing to localhost, From and To addressed are given, subject is entered.

  • Powershell syntax

Excecute the following command in the Command window.

Powershell.exe -executionpolicy remotesigned -File c:\email\sendmymail.ps1

The script above will send the email to abcdefg123455@gmail.com. This can be put in a batch file and configure as a scheduled task. You can make your processes automated e.g. run a process and send email to IT manager/Admin about the status of the execution etc.

If you already have a SMTP server in your network and you want to use it to send the email then in the .ps1 script $smtpserver should point to your standard SMTP server by its identifier (ip or host name). On your SMTP server though you need to add the IP address of this server in the Relay setting (shown above).


Microstation Development Language (MDL) – Place LineString

Back to MDL blog again.. Today we will do a simple program which will explain you a number of things in MDL programming in a simplified manner.

We will place a line string through a MDL program. Remember that this code is only applicable to the older version (Microstation/J – version 7).

In this program, I am showing how to
1. Show a prompt to the user
2. How to initiate a function on a data click
3. How to initiate a function on the right-click (Reset)
3. How to show a rubber band effect
4. How to generate a linestring in the end

The code is simple and self-explanatory but I will still add some description for you to understand.

In the program a prompt will ask use to give a point, when user gives a point in the view, an array of points will be populated and a counter of the number of vertices will be maintained. When user gives a right-click, the linestring placement will complete and a linestring will be generated. The user will be also see the rubber band dynamic display of the linestring as he gives point.


//include files
#include <mdl.h>
#include <tcb.h>
#include <mselems.h>
#include <userfnc.h>

//variable to create the linestring
MSElementUnion oElm;

//maximum 101 vertices – This is an array of coordinates
Dpoint3d lsPoints[MAX_VERTICES];

//number of vertices for the dynamic display of the linestring
int ntmpcount = 0;

//number of vertices to create a final linestring
int nvertexCount = 0;

//function definitions – if not added then it will not compile
void LS_NextPoint(Dpoint3d *point,int numView);
void LS_Complete(Dpoint3d *point,int numView);

//Dynamic display function, it is passed a cursor coordinate as the //cursor moves in the map
//dgnBuf is used for the dynamic display
//If this function is not defined then user will be able to give a point //in the map as usual but will not see how his linestring is appearing //in the map at the runtime.

int LineStringDynamics(Dpoint3d *ptP,int view)
{
ntmpcount = nvertexCount;
lsPoints[ntmpcount].x = ptP->x;
lsPoints[ntmpcount].y = ptP->y;

mdlLineString_create(dgnBuf, NULL, lsPoints, (ntmpcount+1));

return (SUCCESS);
}

//This is function receives a point on a data click, point array is //populated and vertex counter is incremented. The function calls itself // on a dataclick, it also sets a dynamic display function and complete //function on a right-click
void LS_NextPoint(Dpoint3d *point,int numView)
{

lsPoints[nvertexCount].x=point->x;
lsPoints[nvertexCount].y=point->y;

nvertexCount = nvertexCount+1;
mdlOutput_prompt(“Give the next point”);

mdlState_setFunction (STATE_DATAPOINT,LS_NextPoint);
mdlState_dynamicUpdate (LineStringDynamics, FALSE);
mdlState_setFunction (STATE_RESET,LS_Complete);
}

//When user gives a right-click the complete function is called, line //string is created, added to the file displayed normally, dialog box //shows a message to the user about the completion of the command and a //default command call is made. The Exit function call is made in the //end
void LS_Complete(Dpoint3d *point,int numView)
{
if(nvertexCount<2)
{
mdlOutput_prompt(“Give next point”);
mdlState_setFunction (STATE_DATAPOINT,LS_NextPoint);
}
else
{

mdlLineString_create(&oElm, NULL, lsPoints, nvertexCount);
mdlElement_add (&oElm);
mdlElement_display (&oElm, NORMALDRAW);
mdlOutput_prompt(“”);
mdlDialog_openInfoBox(“Placement is complete”);
mdlState_startDefaultCommand ();
mdlSystem_exit(NULL,1);
}
}

//program entry point – the function prompts user to give a first point
//A function call on a data click is set

int main(int argc, char *argv[])
{
mdlOutput_prompt(“Give the first point”);
mdlState_setFunction (STATE_DATAPOINT,LS_NextPoint);
return 0;
}


As you see the code above can be saved as a whole (with comments) in a file placeline.mc and compile as explained in the blog – Hello World MDL

Open a dgn file and execute the command as

mdl l \placeline

See the dynamic display below:

rubberband

The linestring placement is complete.

lscomplete

I will add more blogs on MDL, any comments or questions are welcome! Thank you!

How to Run FME Workspace from the FME Server through database triggers

I was asked to look into how a FME script can be run from FME Server through trigger mechanism. Well there obviously help available on safe.com – Article. But I wanted to make it even simpler for the user to understand. It is assumed the reader has the adequate knowledge of the FME Desktop and the FME Server. I hope it helps someone!

In my workflow when a row is inserted, updated  or deleted on a SQL Server table, log a row in a CSV file accessible to FME server.

Follow the instructions below:

  1. Login to SQL Server Server Management Studio and login to your SQL server.
  1. Create a test database if you don’t have one. In my case I created it as TRIGGERTEST.
  1. Login with the user and create a table called Employee
USE "TRIGGERTEST"
CREATE TABLE [dbo].[EMPLOYEE](
[EMPLOYEE_NUM] [INT] NULL,
[EMPLOYEENUM_NAME] [char](50) NULL
)
GO
  1. Run the following command to activate the automation procedures
    USE "TRIGGERTEST"

    sp_configure 'show advanced options', 1;
    RECONFIGURE
    GO

    sp_configure 'Ole Automation Procedures', 1;
    RECONFIGURE
    GO
  1. There are some stored procedures in the SYS to which the user used to insert/update or delete, need to be assigned the grants to execute. But on my SQL Server, the user  (called sa) already has the EXECUTE grants on the procedures (sp_OASetProperty, sp_OAMethod, sp_OAGetErrorInfo, sp_OADestroy, sp_OAStop, sp_OACreate and sp_OAGetProperty) from SYS.
  1.   Create the following procedure, run the procedure as it is:
create procedure [dbo].[HTTP_DB_MESSAGE]( @sUrl varchar(2000), @message varchar(max)) 
    As
    Declare
    @obj int
    ,@hr int
    ,@status int
    ,@msg varchar(256)

   exec @hr = sp_OACreate 'MSXML2.ServerXMLHttp', @obj OUT
    if @hr <> 0 begin Raiserror('sp_OACreate MSXML2.ServerXMLHttp.3.0
    failed', 16,1) return end
    exec @hr = sp_OAMethod @obj, 'open', NULL, 'POST', @sUrl, false
    if @hr <>0 begin set @msg = 'sp_OAMethod Open failed' goto eh end
    exec @hr = sp_OAMethod @obj, 'setRequestHeader', NULL, 'Content-Type',  'application/x-www-form-urlencoded'
    if @hr <>0 begin set @msg = 'sp_OAMethod setRequestHeader failed' goto
    eh end 
    exec @hr = sp_OAMethod @obj, send, NULL, @message
    if @hr <>0 begin set @msg = 'sp_OAMethod Send failed' goto eh end
    exec @hr = sp_OADestroy @obj
   return
    eh:
    exec @hr = sp_OADestroy @obj
    return
GO
  1. Create the following triggers on the table Employee which would run the FME SERVER script when insert , update and a delete operation is performed.
In the procedure below -see the line - 
SELECT 'operation=INSERT&num=' + CAST(EMPLOYEE_NUM as CHAR) + '&name=' + CAST(EMPLOYEE_NAME as CHAR) as mes

Here words operation, name and num are used in the FME script which would get triggered, further. Through this line we are going to pass the parameters to the FME Server workspace url

The trigger script forms the parameter list in key value pairs and appends to the FME Server url, see the lines –

@sUrl = N'http://193.120.94.130:8080/fmejobsubmitter/trigger/sqlserver_employee_logger.fmw',

 @message = @mes

trig1

CREATE TRIGGER [dbo].[TRG_EMPLOYEE_INSERT]
    ON [dbo].[EMPLOYEE]
    AFTER INSERT
    AS
    BEGIN
        DECLARE @mes VARCHAR(max)
        DECLARE @hr INT
        DECLARE @obj INT
        -- SQL Server does not support 'for each rows' Trigger.
        -- Therefore, it is necessary to make a loop and create a manual 'for each row' method
        DECLARE curs CURSOR FOR
         SELECT 'operation=INSERT&num=' + CAST(EMPLOYEE_NUM as CHAR) + '&name=' + CAST(EMPLOYEE_NAME as CHAR) as mes
            FROM inserted
        OPEN curs
        FETCH NEXT FROM curs INTO @mes
        WHILE @@FETCH_STATUS = 0
        BEGIN
            -- Run HTTP request procedure
            EXEC    [dbo].[HTTP_DB_MESSAGE]
            @sUrl = N'http://193.120.94.130:8080/fmejobsubmitter/trigger/sqlserver_employee_logger.fmw',
            @message = @mes
            FETCH NEXT FROM curs INTO @mes
        END
        CLOSE curs
        DEALLOCATE curs
    END
    GO
    -- Step 6. Create Trigger UPDATE on EMPLOYEE table
    CREATE TRIGGER [dbo].[TRG_EMPLOYEE_UPDATE]
    ON [dbo].[EMPLOYEE]
    AFTER UPDATE
    AS
    BEGIN
        DECLARE @mes VARCHAR(max)
        DECLARE @hr INT
        DECLARE @obj INT
        -- SQL Server does not support 'for each rows' Trigger.
        -- Therefore, it is necessary to make a loop and create a manual 'for each row' method
        DECLARE curs CURSOR FOR
         SELECT 'operation=UPDATE&num=' + CAST(EMPLOYEE_NUM as CHAR) + '&name=' + CAST(EMPLOYEE_NAME as CHAR) as mes
            FROM inserted
        OPEN curs
        FETCH NEXT FROM curs INTO @mes
        WHILE @@FETCH_STATUS = 0
        BEGIN
            -- Run HTTP request procedure
            EXEC    [dbo].[HTTP_DB_MESSAGE]
            @sUrl = N'http://193.120.94.130:8080/fmejobsubmitter/trigger/sqlserver_employee_logger.fmw',
            @message = @mes
            FETCH NEXT FROM curs INTO @mes
        END
        CLOSE curs
        DEALLOCATE curs
    END
    GO
    -- Step 7. Create Trigger DELETE on EMPLOYEE table
    CREATE TRIGGER [dbo].[TRG_EMPLOYEE_DELETE]
    ON [dbo].[EMPLOYEE]
    AFTER DELETE
    AS
    BEGIN
        DECLARE @mes VARCHAR(max)
        DECLARE @hr INT
        DECLARE @obj INT
        -- SQL Server does not support 'for each rows' Trigger.
        -- Therefore, it is necessary to make a loop and create a manual 'for each row' method
        DECLARE curs CURSOR FOR
         SELECT 'operation=DELETE&num=' + CAST(EMPLOYEE_NUM as CHAR) + '&name=' + CAST(EMPLOYEE_NAME as CHAR) as mes
            FROM deleted
       OPEN curs
        FETCH NEXT FROM curs INTO @mes
        WHILE @@FETCH_STATUS = 0
        BEGIN
            -- Run HTTP request procedure
            EXEC    [dbo].[HTTP_DB_MESSAGE]
            @sUrl = N'http://193.120.94.130:8080/fmejobsubmitter/trigger/sqlserver_employee_logger.fmw',
            @message = @mes
            FETCH NEXT FROM curs INTO @mes
        END
        CLOSE curs
        DEALLOCATE curs
    END
  1. On the FME Server, create a repository called “trigger” and assign grant to fmeguest to execute scripts in it. See the snapshots below:trig2

trig3


trig4

  1. Create a FME Script (fmw’), make sure there are 3 published parameters called num, name and operation as these 3 parameters are passed from the trigger scripts. In the script, fetch those parameters and create attributes from them and use them to populate a CSV file.                                                                                                                                  fmetrigger
  2. Publish this script to trigger repository on the FME Server using the Job Submitter service.
  3. Create a CSV file on FME Server and keep it in c:\temp\EmployeeTableLog folder.trig6
  4. Done! Run the following SQL commands in SQL Server.
INSERT into [triggertest].[dbo].[employee] values(100,'Kirk');
UPDATE [triggertest].[dbo].[employee] set employee_name ='Ciaran');
DELETE from [triggertest].[dbo].[employee] where employee_num=100;

This would trigger through SQL Server and execute FME script on FME Server and populate a CSV file as designed in the script.

trig7

Hexagon’s Spatial Geoportal – Custom Development using JavaScript

Hexagon’s Geospatial Portal is a full-featured, configurable and customizable thin client application that can be used for finding, viewing, querying, analyzing, and consuming geospatial data published by Hexagon Geospatial products and/or other standards-based web services. The portal can be accessed by multiple users via web browsers as it is installed and configured on a web application server.

You can easily create custom functionality in the portal using Javascript. The example shown here is developed using EXTJS. Ext JS is a pure JavaScript application framework for building interactive cross platform web applications using techniques such as Ajax, DHTML and DOM scripting. Originally built as an add-on library extension of YUI by Jack Slocum April 15, 2007, Ext JS includes interoperability with jQuery and Prototype.

I have created a sample application using the Javascript coding – Locate a coordinate in the map. In the form user is asked to enter coordinate details and the scale at which the zoom is needed.

PortalForm

When the Locate button is clicked the map zooms in to the location and also it shows the message as shown below.ZoomedLocation

Again, this is all done via a client side coding on instance service website which was pretty simple. Create your own JavaScript file and add the reference in the full.aspx by simply editing the file in the notepad editor.

Plenty of help and code examples are available on Hexagon’s Knowledgebase here.

In the code,left sidebar panel is added and the controls are added in the table layeout. The code is self-explanatory, if you pay little careful attention to it.

$GP.ready(function () {

$GP.ui.sidebar.add({

xtype: “panel”,

layout: “table”,

layoutConfig: {

columns: 2

},

title: “Locate Coordinate”,

height: 150,

width: 600,

bodyPadding: 10,

defaultType: ‘textfield’,

items: [

{

xtype: ‘label’,

text: ”

},

{

xtype: ‘label’,

text: ”

},

{

xtype: ‘label’,

text: ‘ Easting:’

},

{

xtype: ‘textfield’,

id: ‘easting’,

minLength: ‘5’,

maxLength: ‘9’,

maskRe: /[0-9.]/,

fieldLabel: ‘Easting:’,

name: ‘easting’,

listeners:

{

focus: function(c,e) {

Ext.QuickTips.register({

target:c.getEl(),

text: ‘Enter the Easting (X) value, e.g. 316771.94’,

enabled: true,

showDelay: 20,

trackMouse: true,

autoShow: true

});

}

},

value: ‘316771.94’

},

{

xtype: ‘label’,

text: ‘ Northing:’

},

{

xtype: ‘textfield’,

id: ‘northing’,

minLength: ‘5’,

maxLength: ‘9’,

maskRe: /[0-9.]/,

fieldLabel: ‘Northing:’,

name: ‘northing’,

listeners:

{

focus: function(c,e) {

Ext.QuickTips.register({

target:c.getEl(),

text: ‘Enter the Northing (Y) value, e.g. 233316.56’,

enabled: true,

showDelay: 20,

trackMouse: true,

autoShow: true

});

}

},

value: ‘233316.56’

},

{

xtype: ‘label’,

text: ‘Scale:’

},

{

xtype: ‘textfield’,

id: ‘scale’,

minLength: ‘1’,

maxLength: ‘9’,

maskRe: /[0-9.]/,

fieldLabel: ‘Scale:’,

name: ‘scale’,

listeners:

{

focus: function(c,e) {

Ext.QuickTips.register({

target:c.getEl(),

text: ‘Enter the map scale value, e.g. 500’,

enabled: true,

showDelay: 20,

trackMouse: true,

autoShow: true

});

}

},

value: ‘500’

},

{

xtype: ‘label’,

text: ”

},

{

xtype: “button”,

text: “Locate”,

handler: function (b) {

//Get values from the textfields

var e1 = Ext.getCmp(‘easting’).getValue();

var n1 = Ext.getCmp(‘northing’).getValue();

var s = Ext.getCmp(‘scale’).getValue();

var fstring = “Zooming to ” + e1 + “,” + n1;

//Convert to float

var x1 = parseFloat(e1);

var y1 = parseFloat(n1);

var s1 = parseFloat(s);

//Check coordinate value validity

if (x1 > 18171.00 && x1 < 386691.00 && y1 > 16390.00 && y1 < 461131.00)

{

$GP.ui.info(fstring); //Show message

//Perform Zoom operation

$GP.map.zoom({

scaleDenominator: s,

x: x1,

y: y1

});

}

else {

$GP.ui.info(“The coordinates are not in propert format\nExample values are- Easting: 315257.47, Northing: 234338.95”);

}

}

    }

  ]

});

});

Hope you like the post. Thanks.


Harihar Fort – Thrilling Trek near Trimbak

IMG_20150831_124409

Welcome, it’s been a while since I wrote a blog, well this time, it’s not technical but it’s all about something very thrilling and spectacular I ever experienced when I was in India in September 2015. Its too late to write this blog since I visited this place last year but it was always back of head to write something about it, I might have missed exact details.

IMG_20150831_144709

When I saw a picture of Harihar killa very first time on Facebook, I just watched it again and again and could not get my eyes off it. Made up my mind, that coming holiday I am going to make it special by visiting this place at any cost and experience the thrill of it. Found out two candidates who could be willing to visit this place, sent them the pictures of this breath taking place and both of them agreed immediately but then when started to look more into it, reality understood that it is not that easy and could be dangerous. Eventually it was Mahesh who is into thrill seeking and has good experience in Trekking. As the day came near, Mahesh started to give me other simpler options as I do not have much trekking experience. But I was adamant and convinced him to take a day off and come with me.

I googled but there was not much help available how to reach Harihar killa, except few blogs. Well we could not follow the directions given in those blogs and thought of going to the nearest point to the place by the easiest mean and find the option then if we could.

IMG_20150831_121947

Harihar Killa is in the town of Trimbak, in the Trimbakeshwar tehsil in the Nashik District of Maharashtra, India, 28 km from the city of Nashik.

IMG_20150831_161401

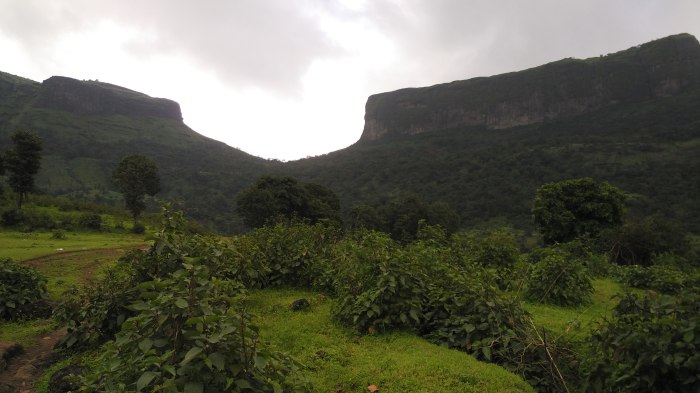
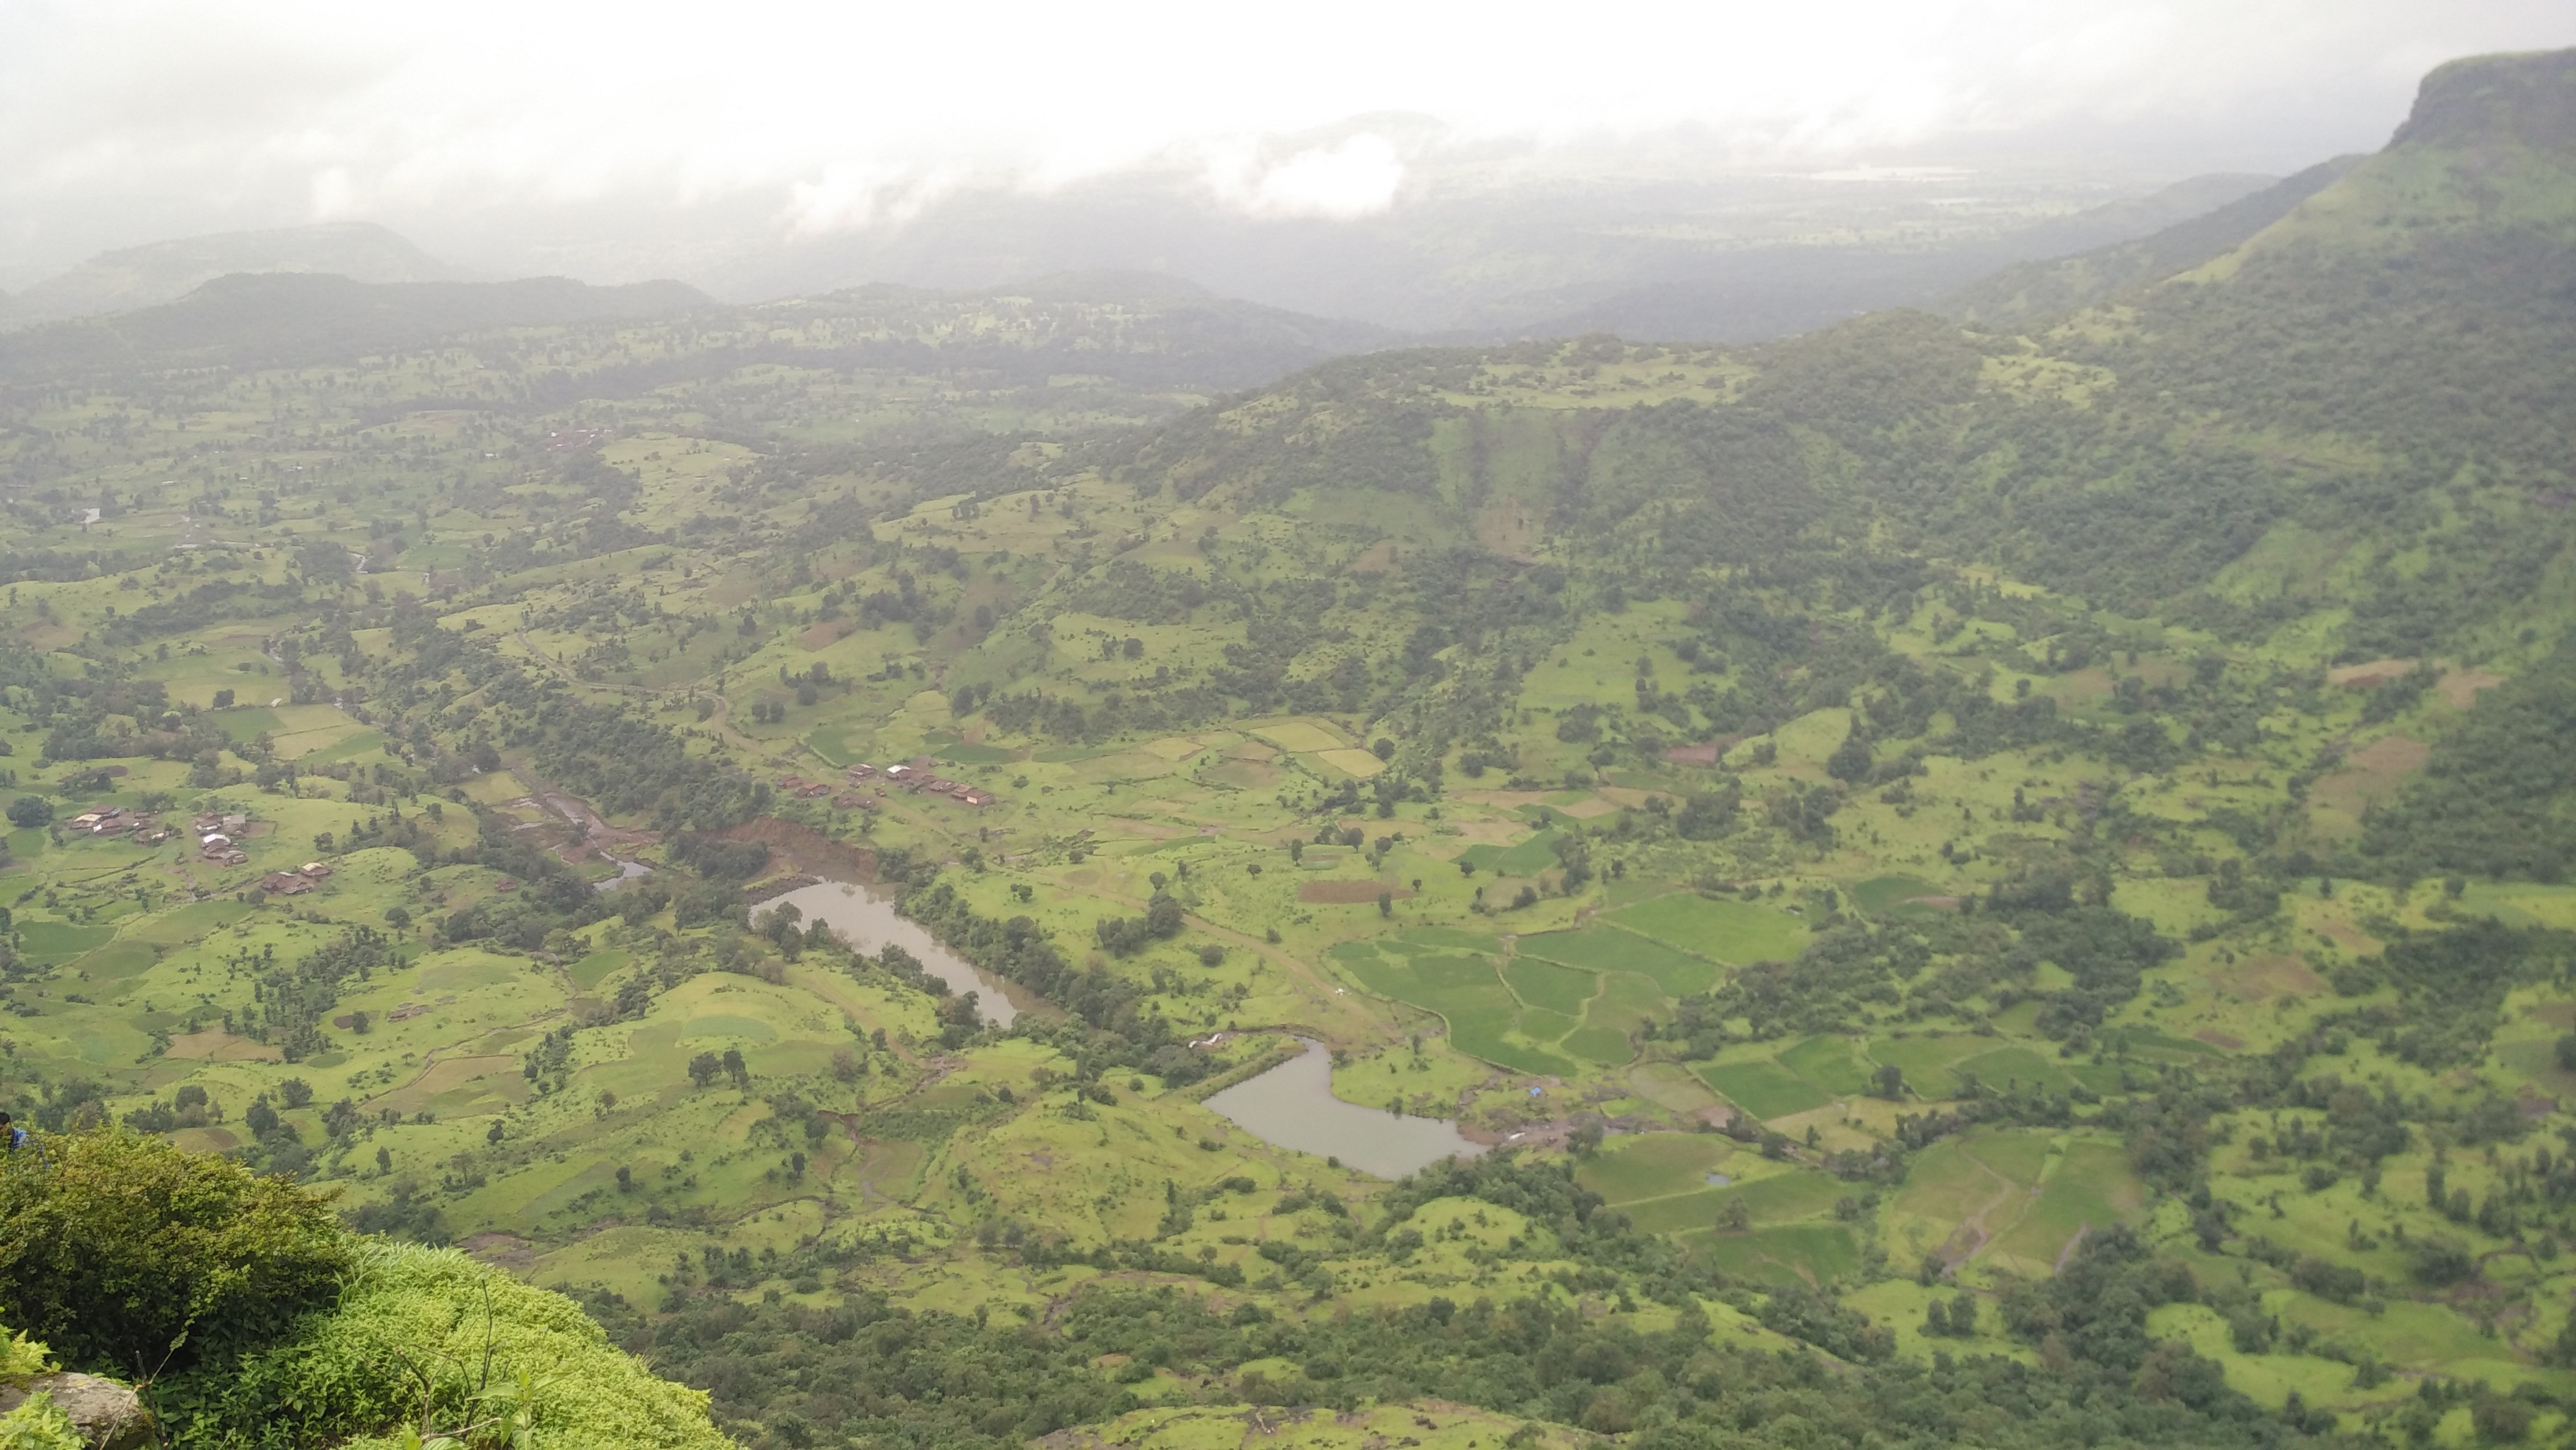
We caught the Kasara local train early in the morning, not that early, in fact it was late. It reached to Karjat around 7.45am. We reached Nasik around 9am. We had nice idli and tea at one of the roadside restaurants :). Then got into a ST (state transport) bus stand from where lot of buses were departing to Trimbak as there was big crown for Kumbh Mela (India’s biggest religious Hindu event). We started asking in the Bus if anyone knew where Harihar Killa is, surprised that no one knew about it. The bus conductor, driver was called from Vidarbh area for Kumbh Mela arrangement. The city was bustling with so many sadhus and pilgrims. IMG_20150831_161406
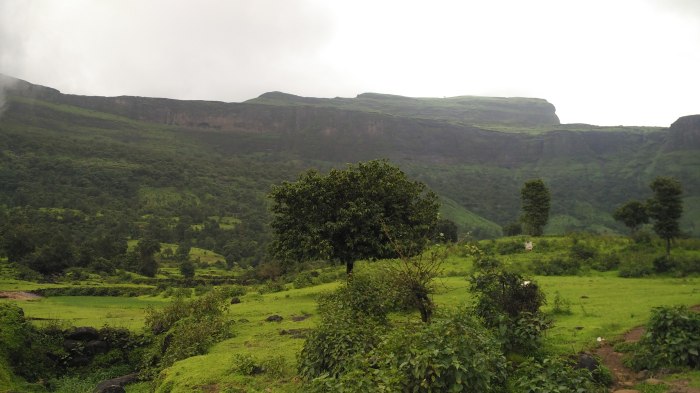
We started asking everyone who was boarding the bus but all of them were first timers to Nasik. We were about to get off when we saw a highest peak on the way but luckily did not, else our plan would have spoiled. We reached to Trimbak at around 10.30am. Only option there was available which could get near to Harihar was the Rikshaw but no one was ready due to Kumbh Mela, the roads were blocked by heavy security, walking off to the place was not an option as it was too far and it was not possible to finish the plan in one day. There was nothing which would commute to Harihar Killa. We were already thinking it was too late and going back. But then a young Rickshaw driver nodded to take us near to the place but he charged us Rs. 800. We okayed, got into the rickshaw, on the way saw some spectacular scenery and reached to the village at the bottom of the peak. Wow, what a view it was, to watch all those peaks.

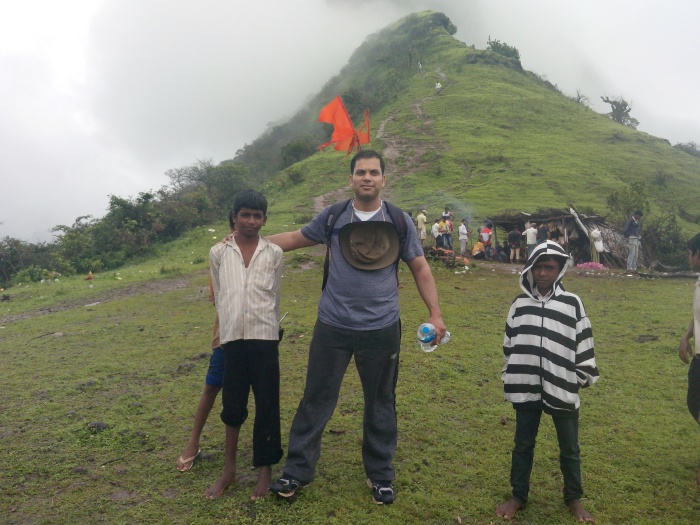
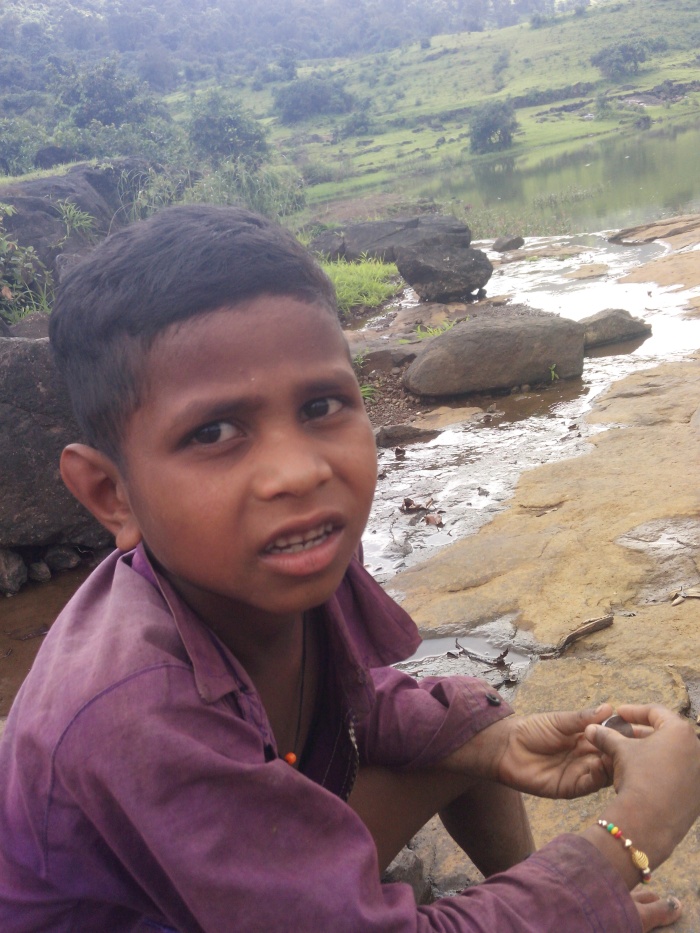
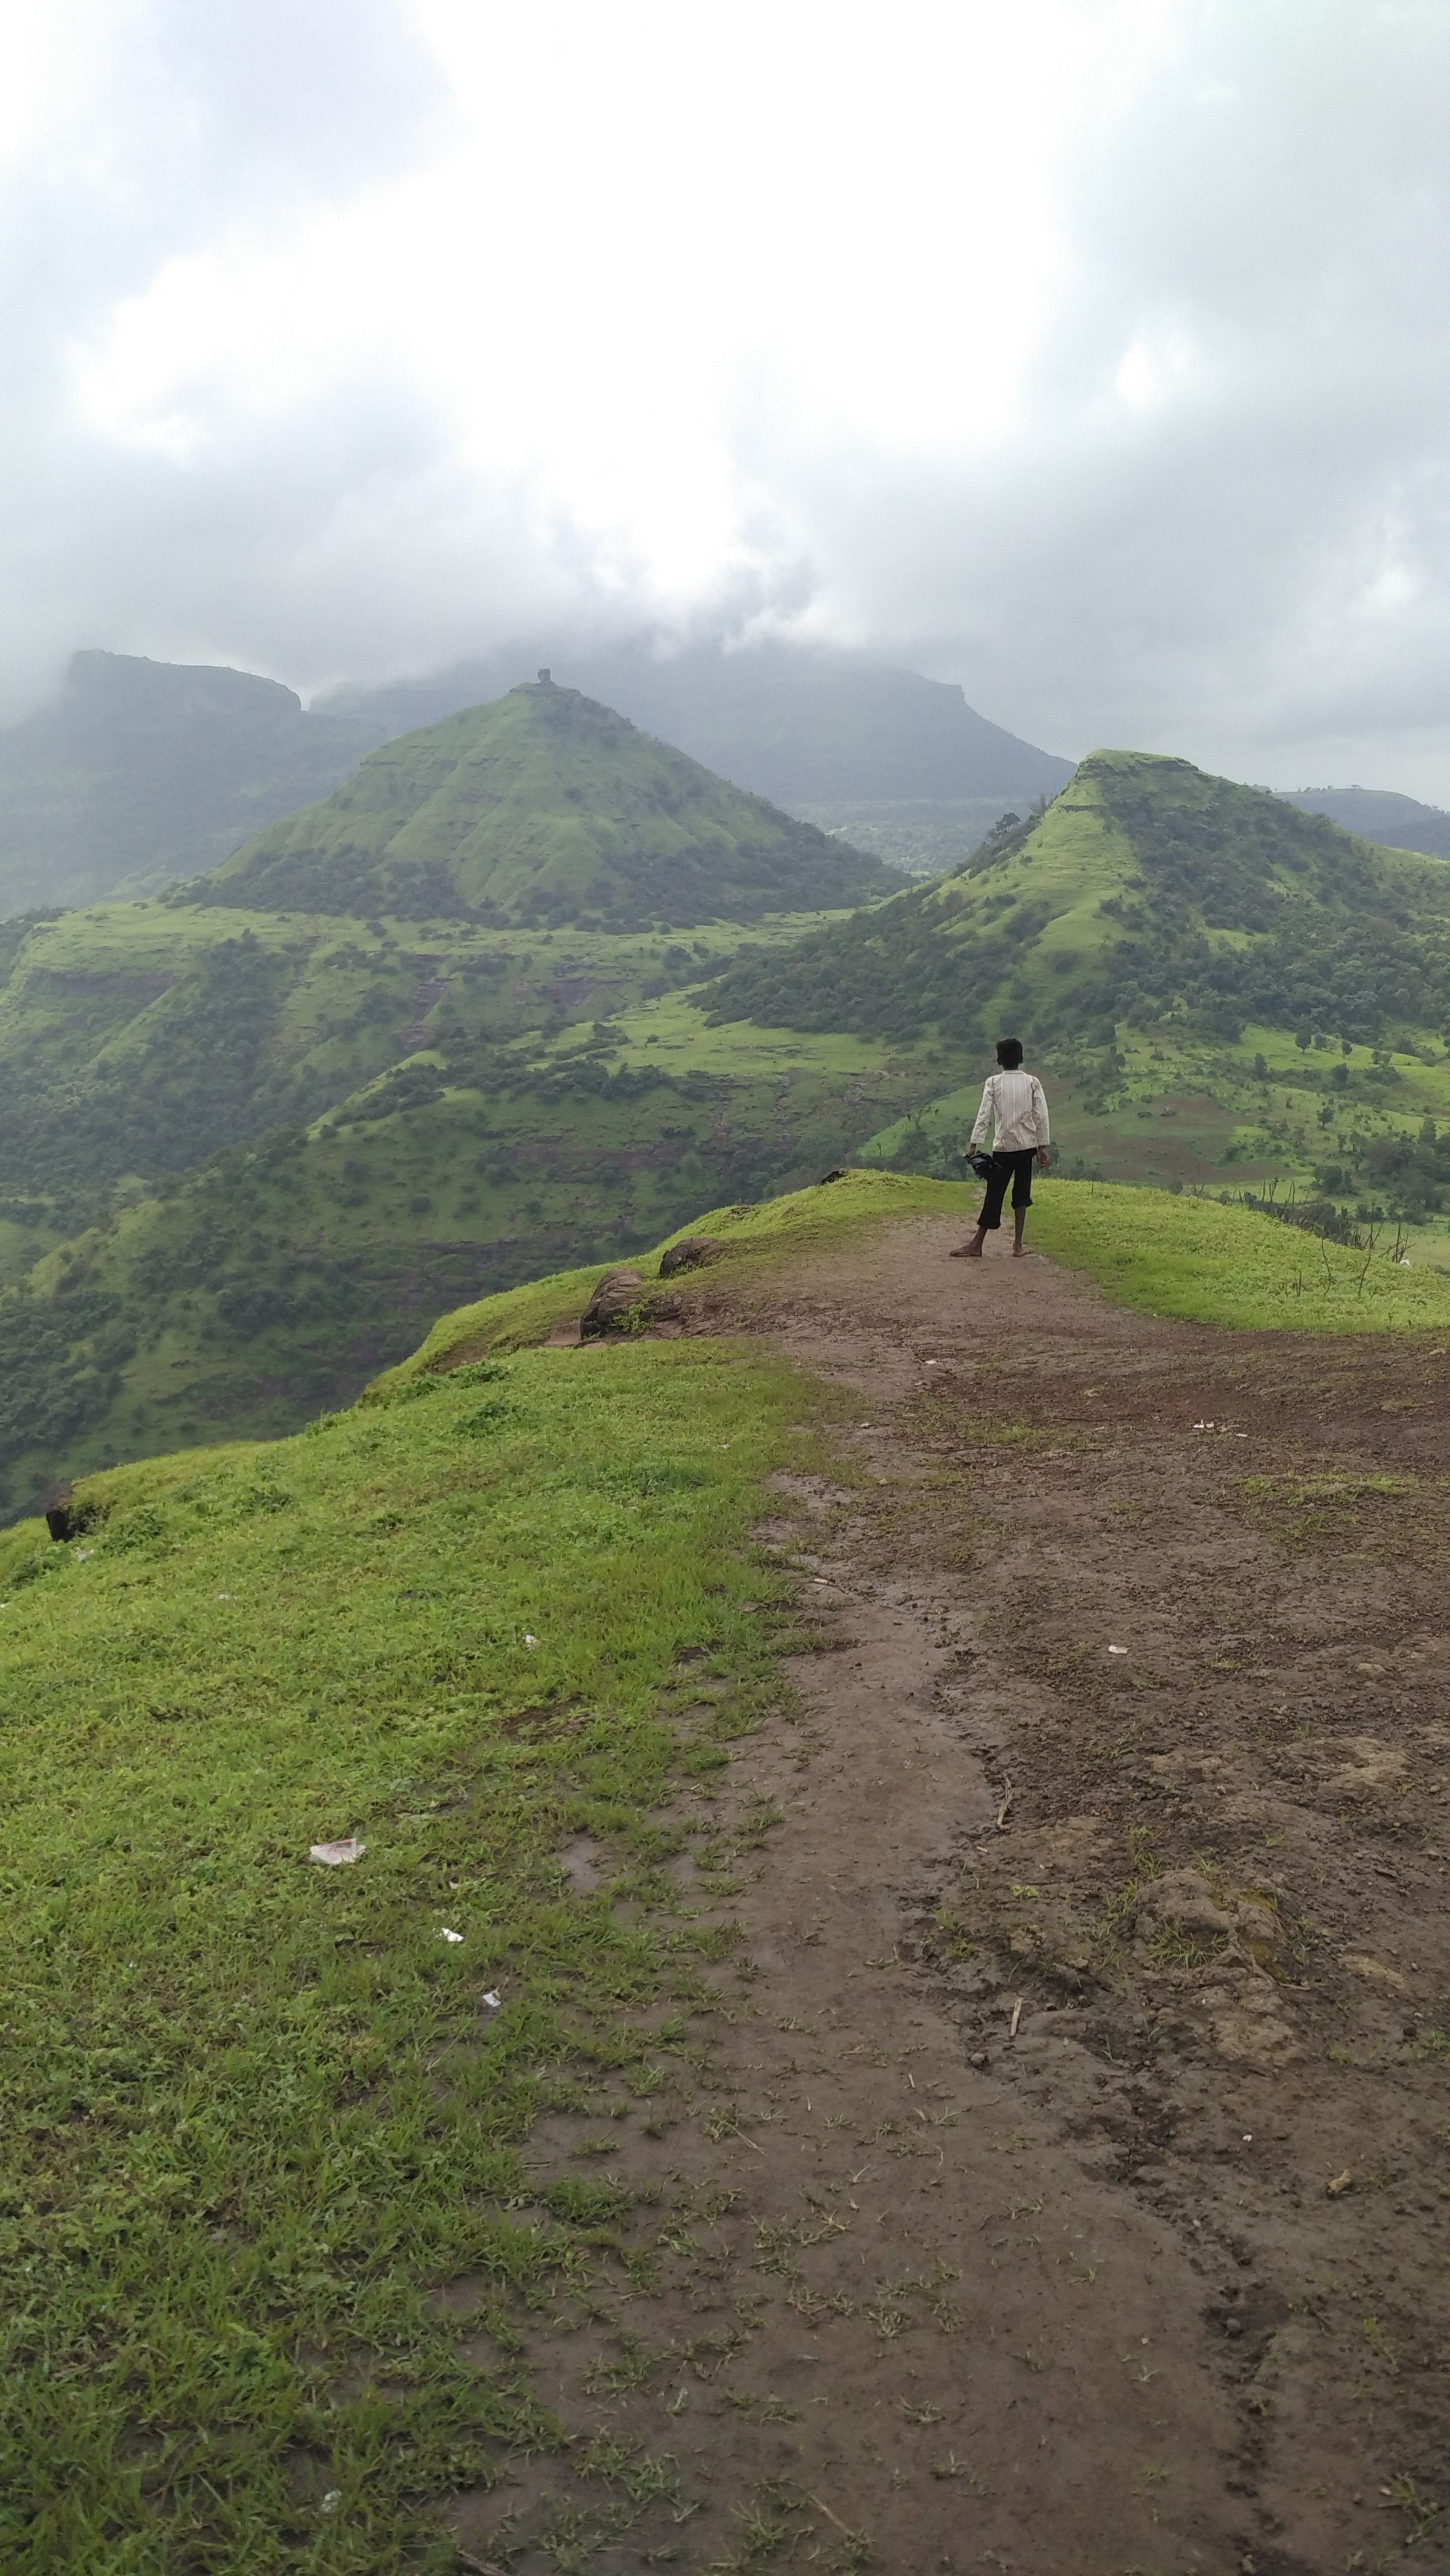
There is a very small village at the base, asked those nice friendly people which way to go, lot of small kids around and they chased us for money or anything. Initially we got really irritated but soon found they were innocent lot. It was rainy, green, slippery and watery all over, the peak we thought was so close but it wasn’t that way. The muddy trails were misleading. there was dense wood out there. We soon realised that we need to get someone with us to get to the top.IMG_20150831_115025

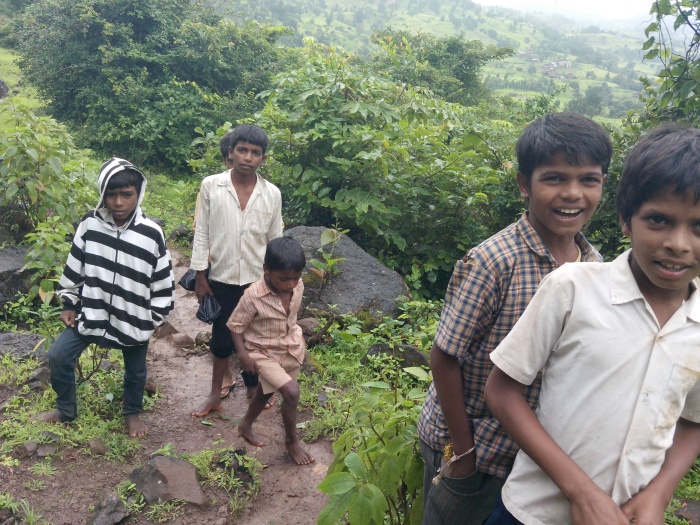
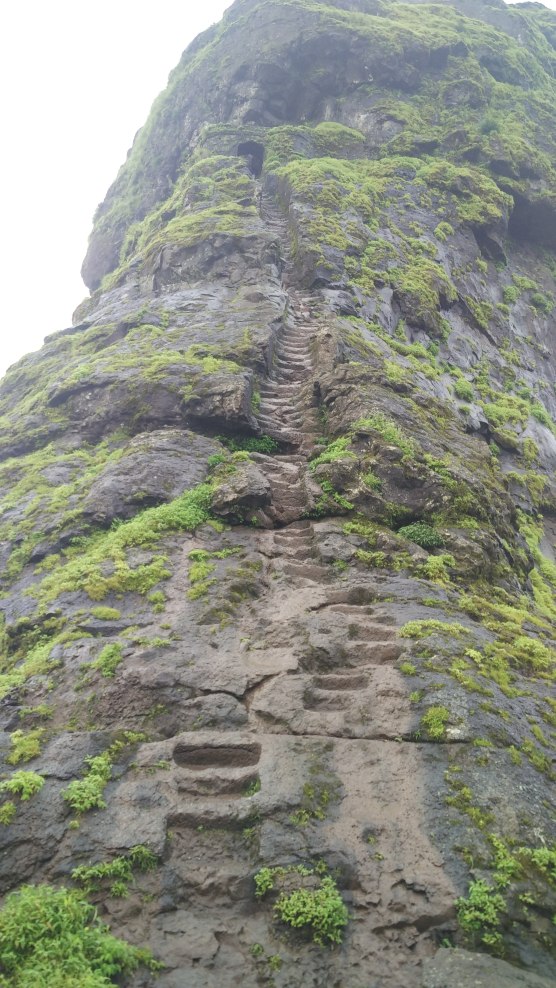
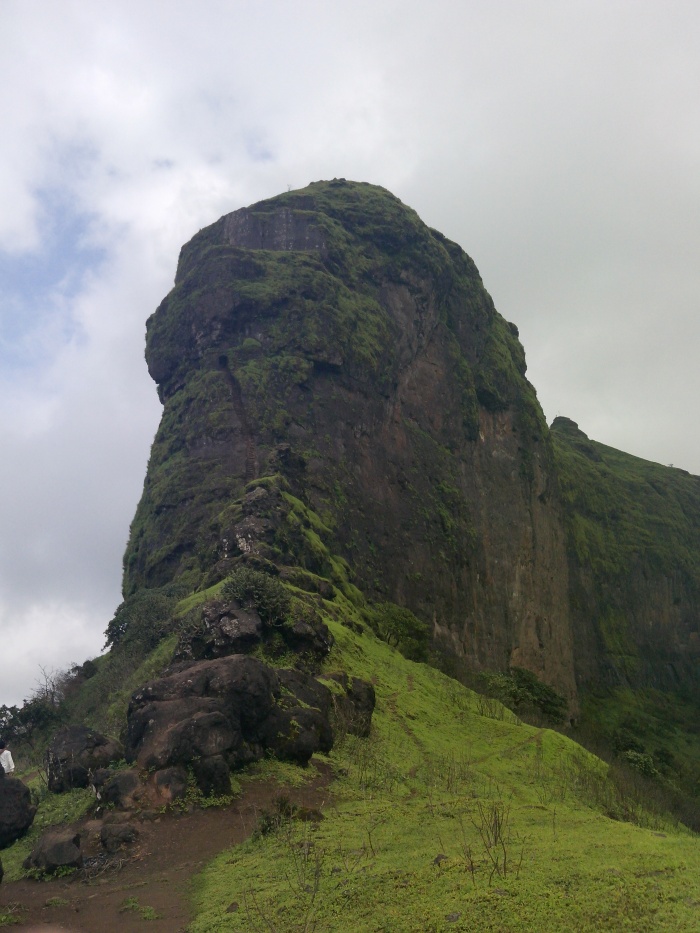
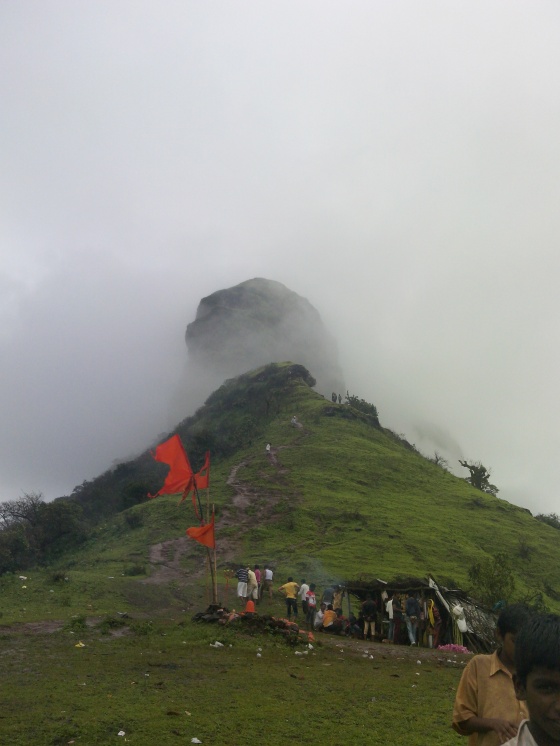
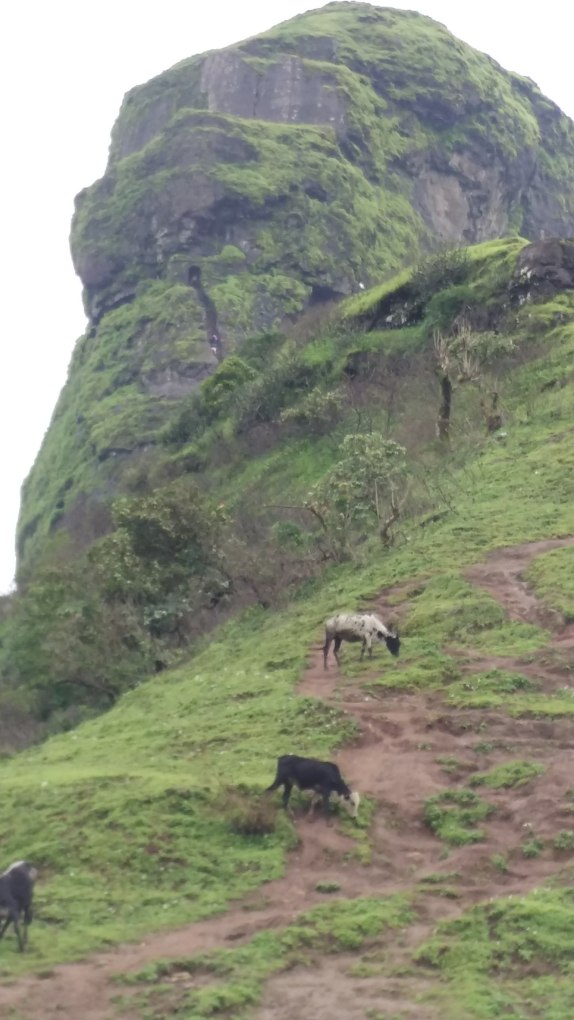
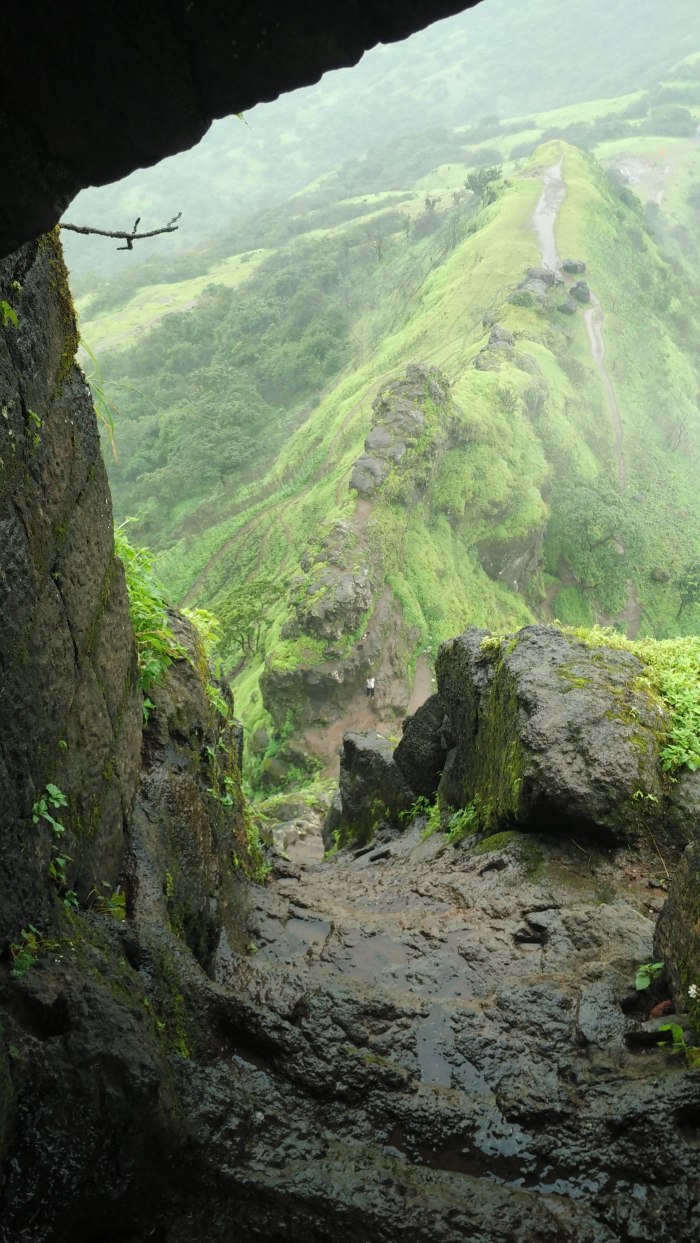
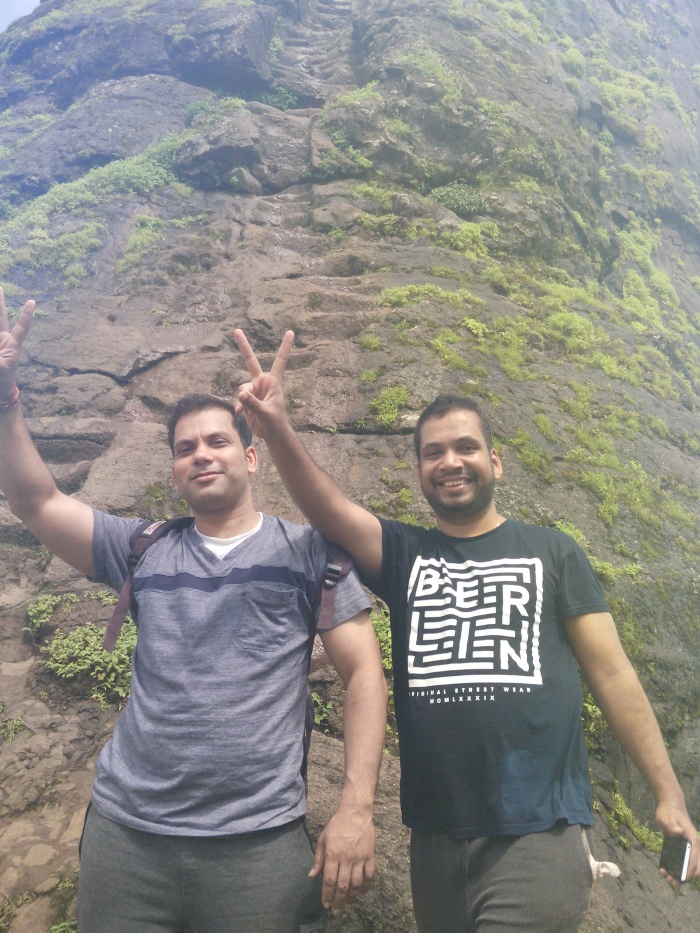
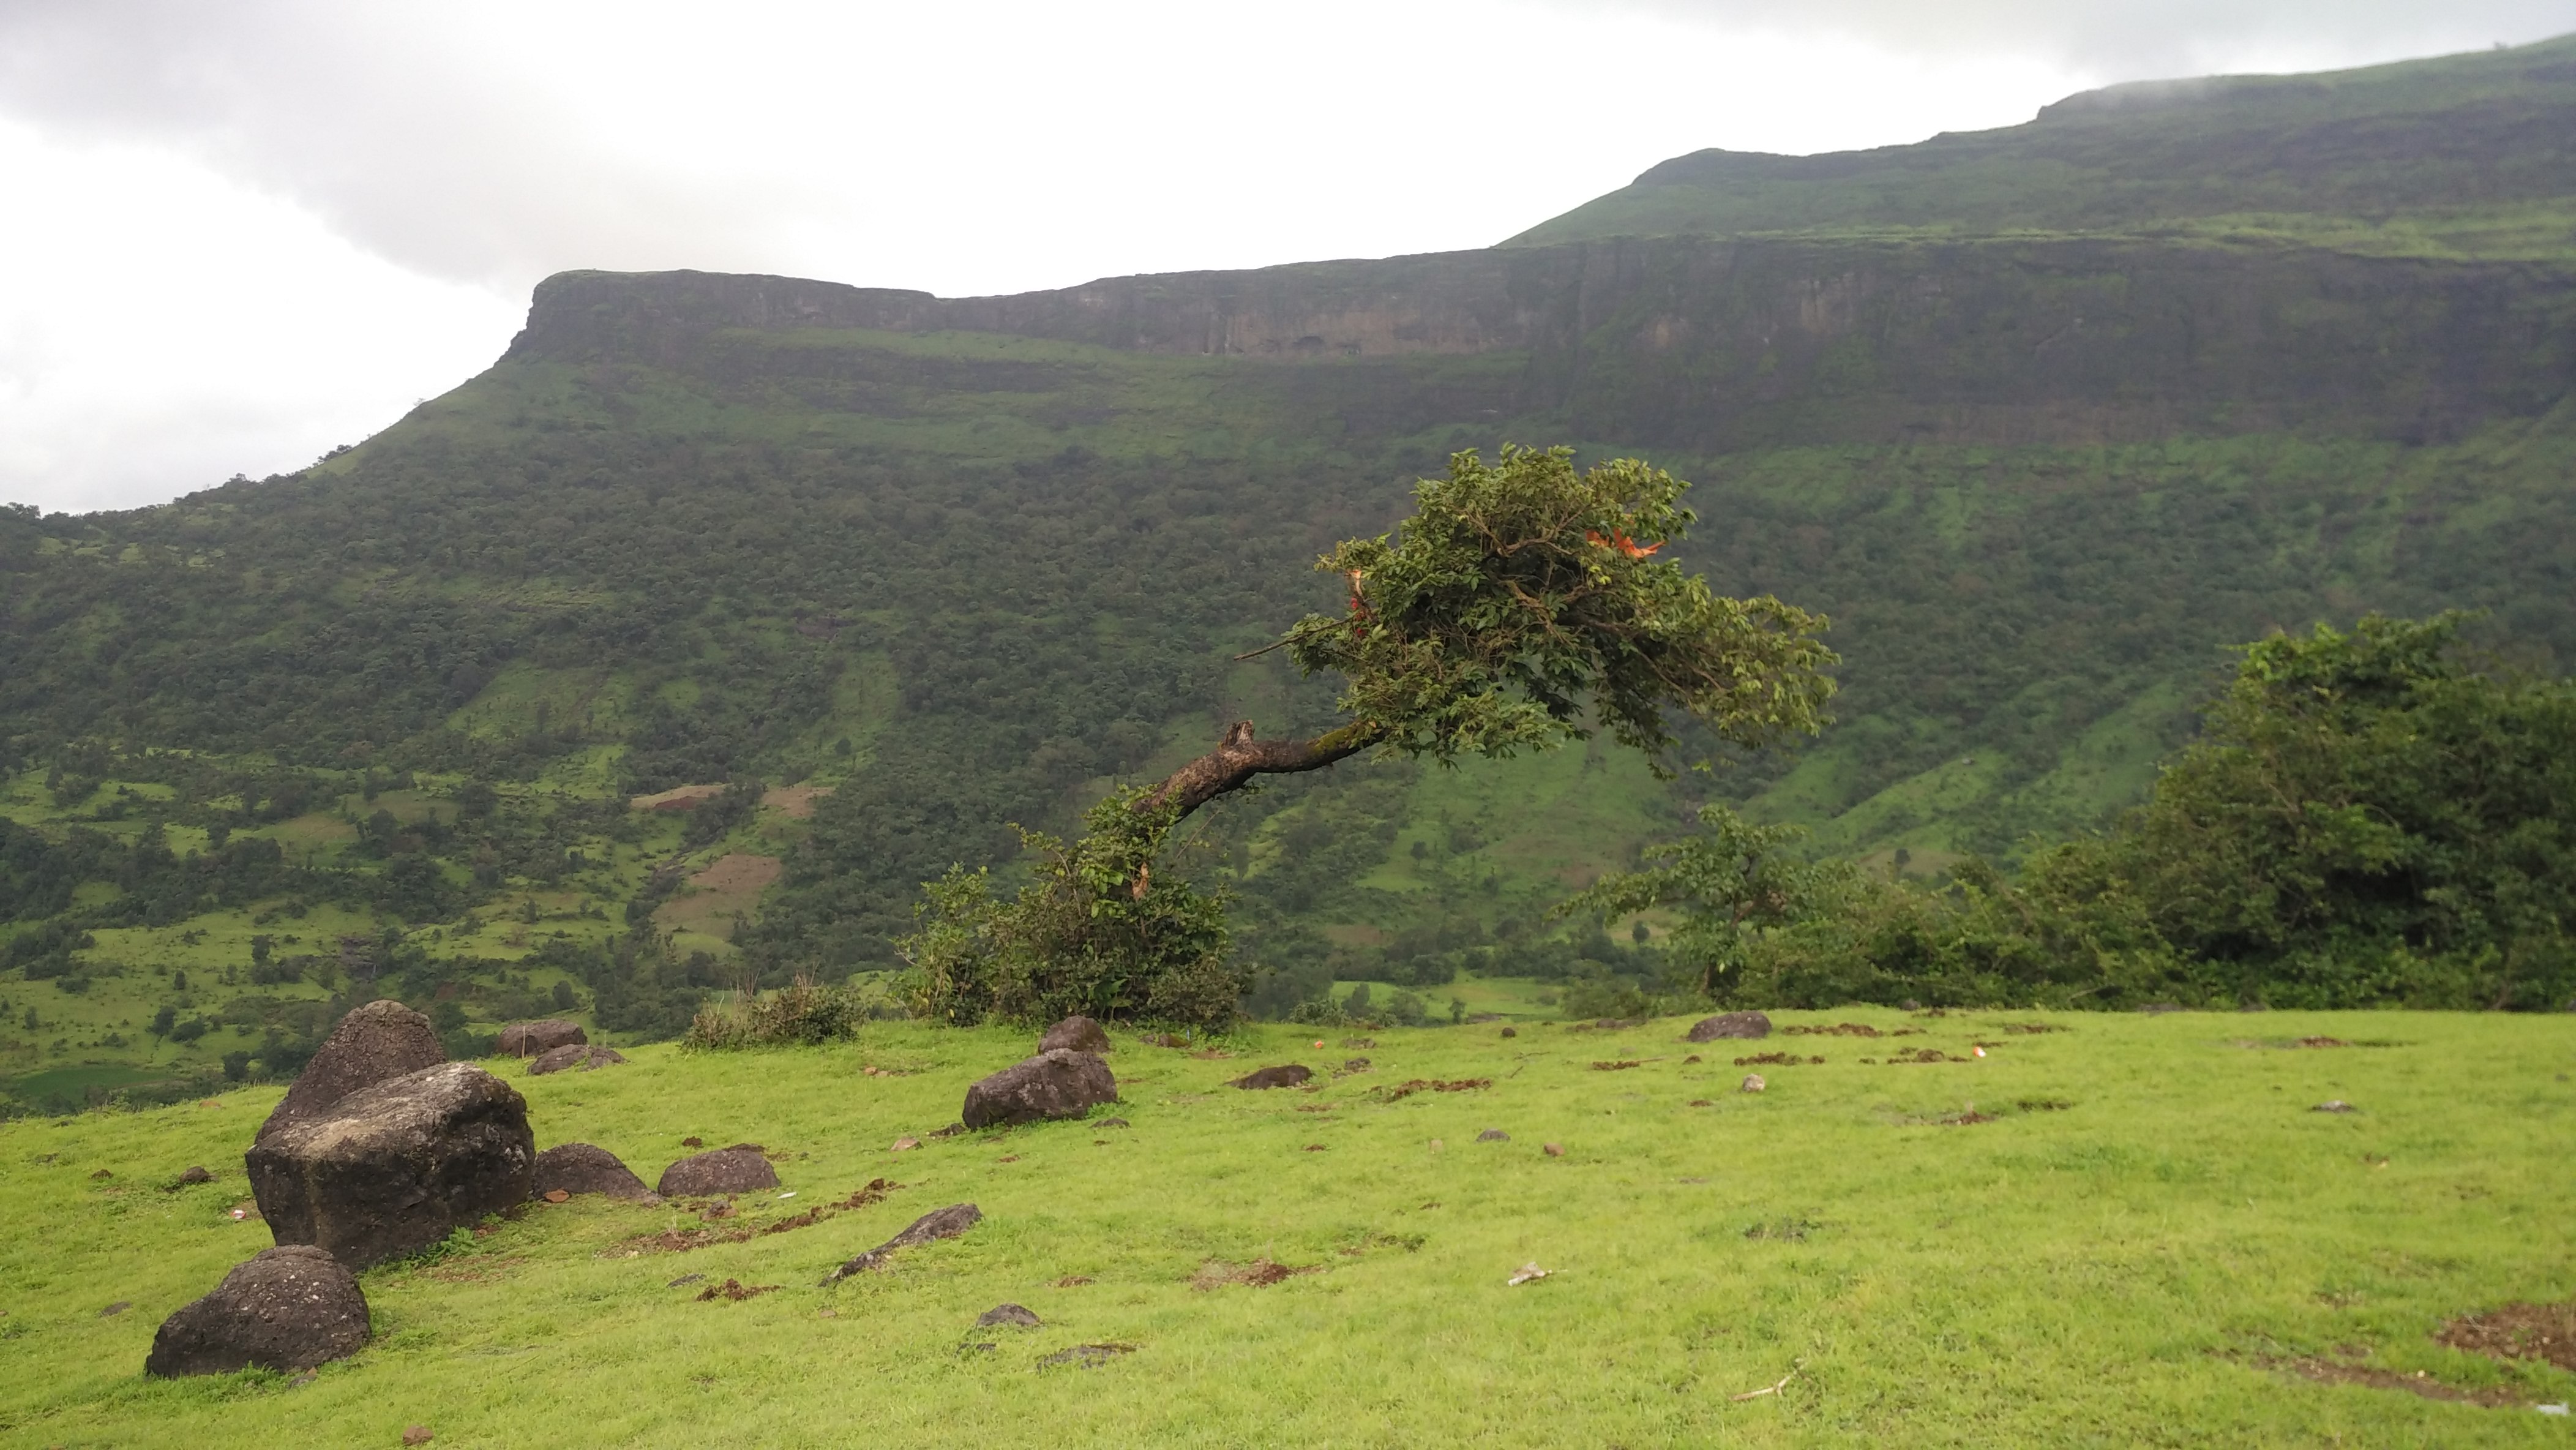
One of the kids, probably 10 we asked to join us and get the award later. He along with two other kids also started us leading to the correct way. It was challenging walk upwards. The skinny kids were not wearing any footwear but were so quick and were not missing a single step and here we two both guys were doing our best. It was around 1.30-hour climb, discussing good old memories, making fun of each other, asking kids about their lives, near the peak there is a challenging climb, we took long time deciding how we should go about it but the child guides and Mahesh’s previous experience helped. As we reached to the base of the main peak, the view I used to see only in pictures, it was just awesome. Took many photos. Looking at those steps literally in 85 degrees, you could feel how difficult it was. Especially when it was raining, freezing and fiercely windy. Mahesh told me that this peak will not be possible to achieve as I never did this kind of climb before and we should just return back. But I disagreed, ‘Ab aye hai to zanda gaad ke hi jayenge’ was my reply. He eventually gave up and we started on those heart stopping steps.


IMG_20150831_145955

IMG_20150831_144740

IMG_20150831_121927

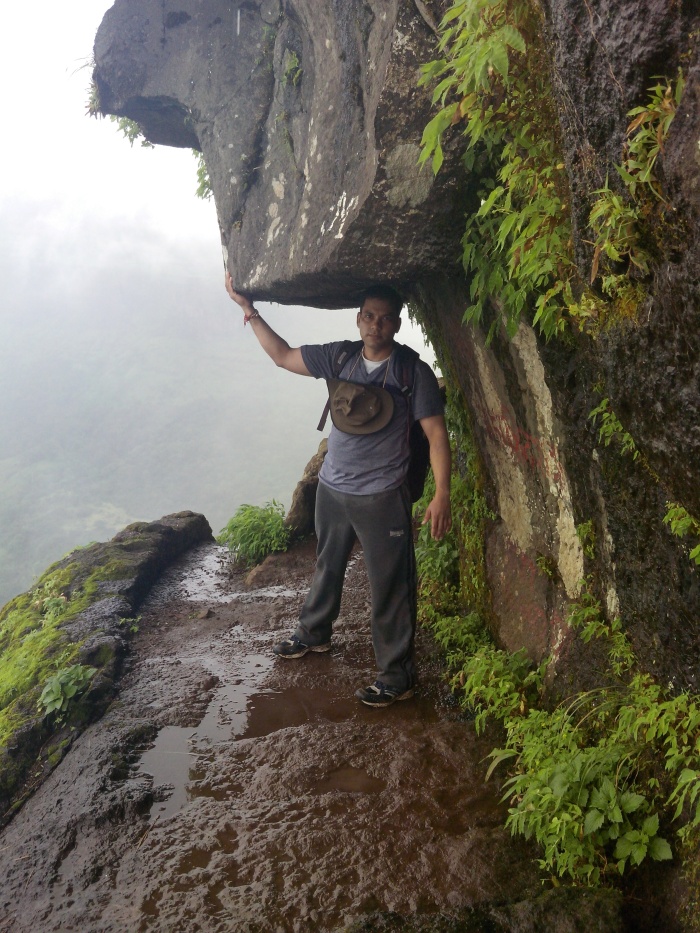
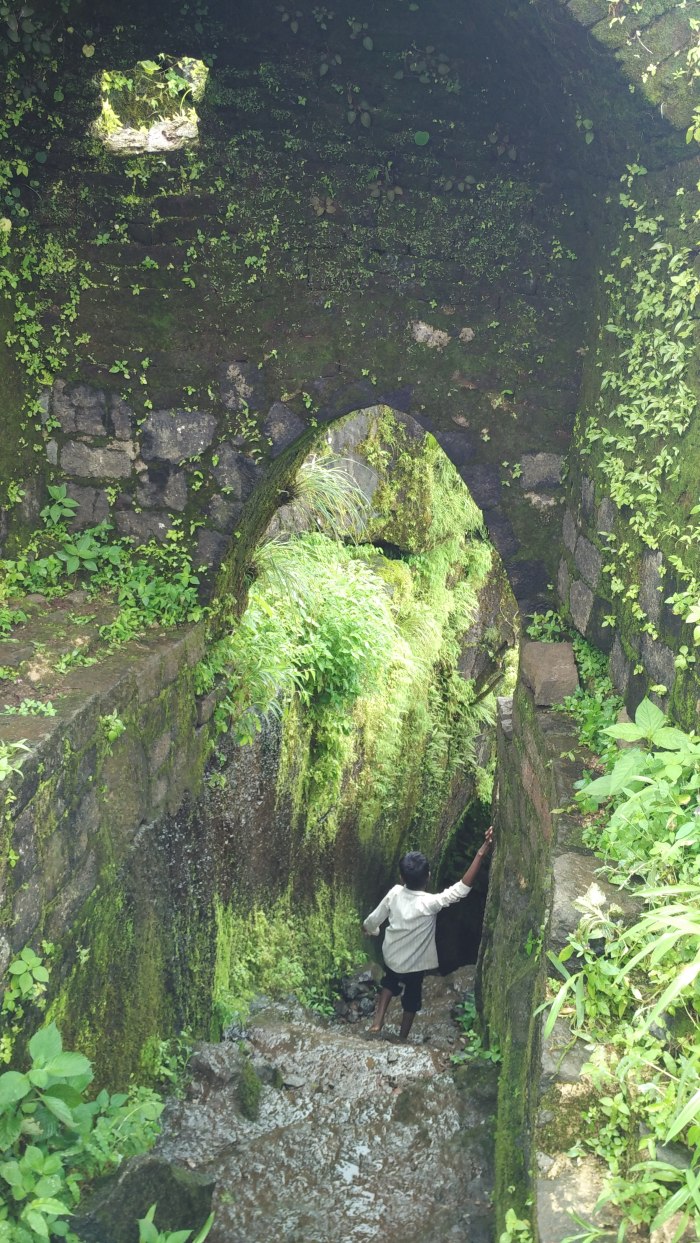
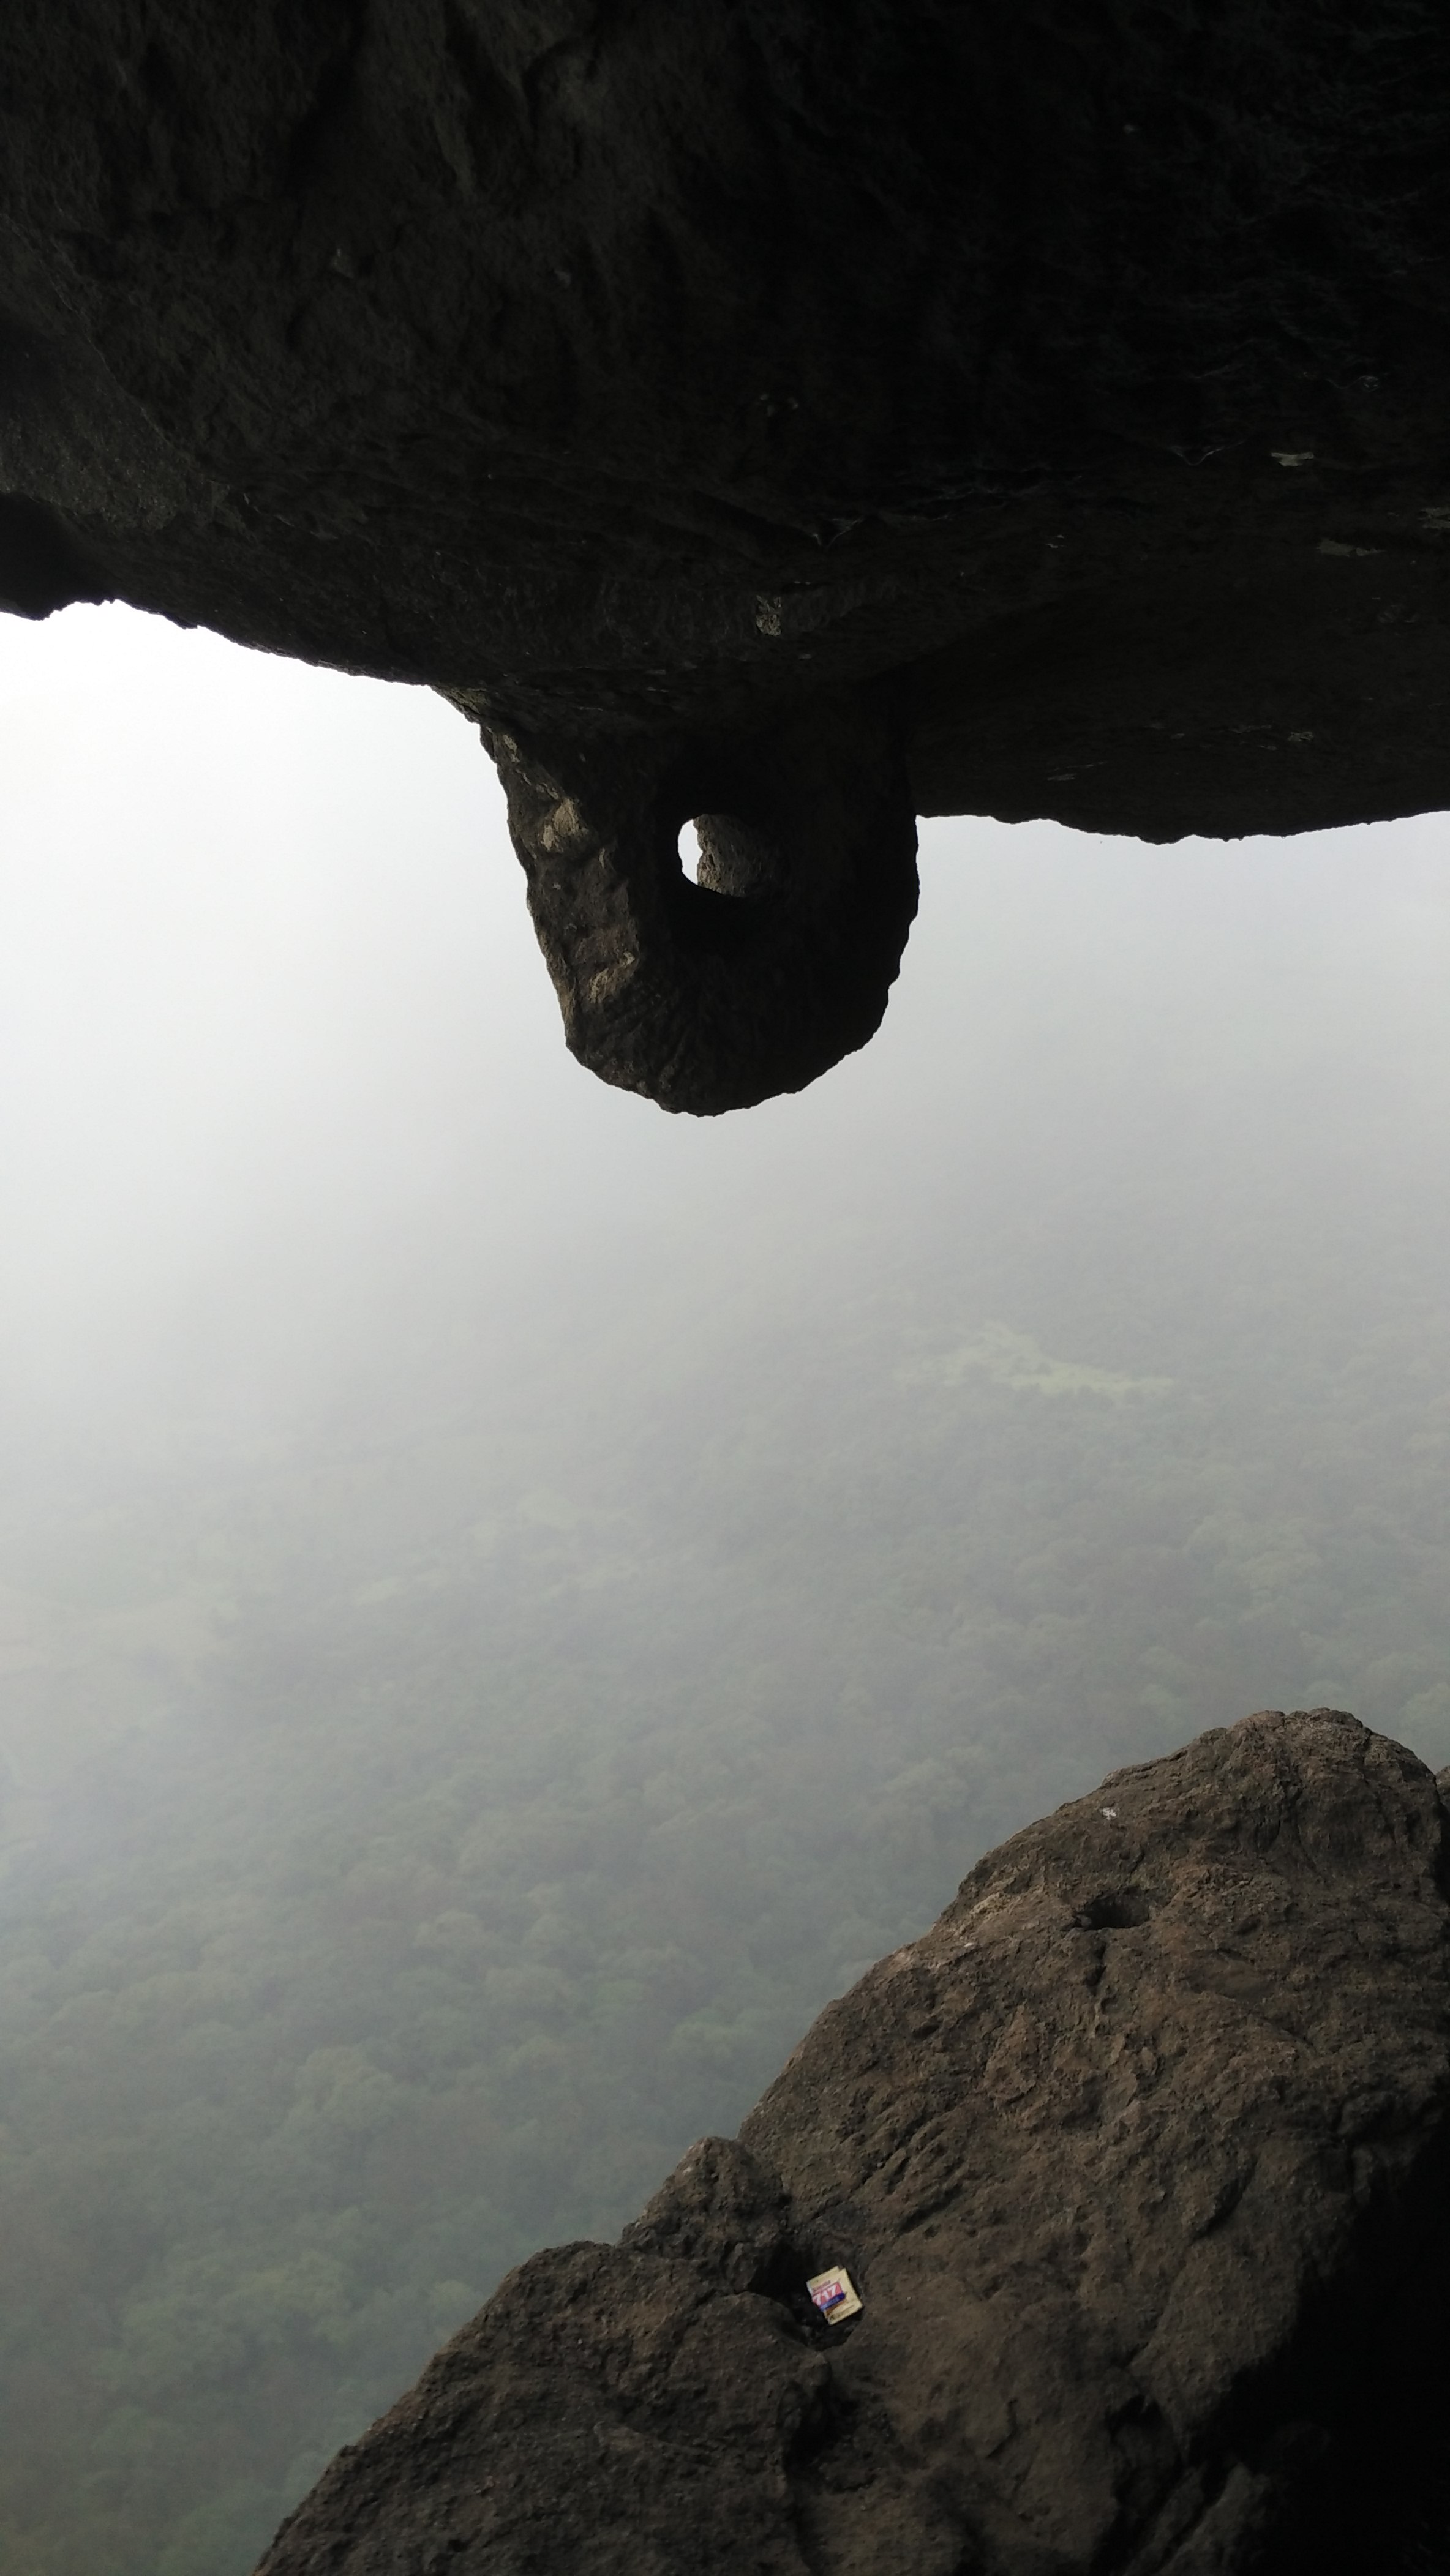
The guys in the tent told us to leave our back packs with them as the wind was so strong and there is a chance of getting blown away. We decided not to. Soon we realised it was tough to climb each step as they are so steep and with every step you go up it was like you cannot cancel it and only way was to go up. I was only thinking how would I get down. Funnily the lightweight kids were so fast in climbing those and guiding in Marathi. We were instructing each other to be extremely careful. Wind was very strong and everything was watery so it slowed us too much, we were not minding anything, soon got the sense how you need extra stamina in these scenario, literally the hands started shaking after a while. Good about those steps is that they got grooves at the edges so you can hold them tightly else I wonder how one would have climbed those. I was not looking downwards as only thing you would see is deep valley beneath. we took about 40 minutes to climb the first block of stairs until we reached the first entrance. Luckily there was no one who was sliding down else It would have been an extremely challenging on those narrow steps. When the first entrance arrived we took some rest. It was like a cave carved in the hard rock, an idol was painted in saffron, it was a spectacular view beneath.


IMG_20150831_140425
IMG_20150831_125935

IMG_20150831_130017

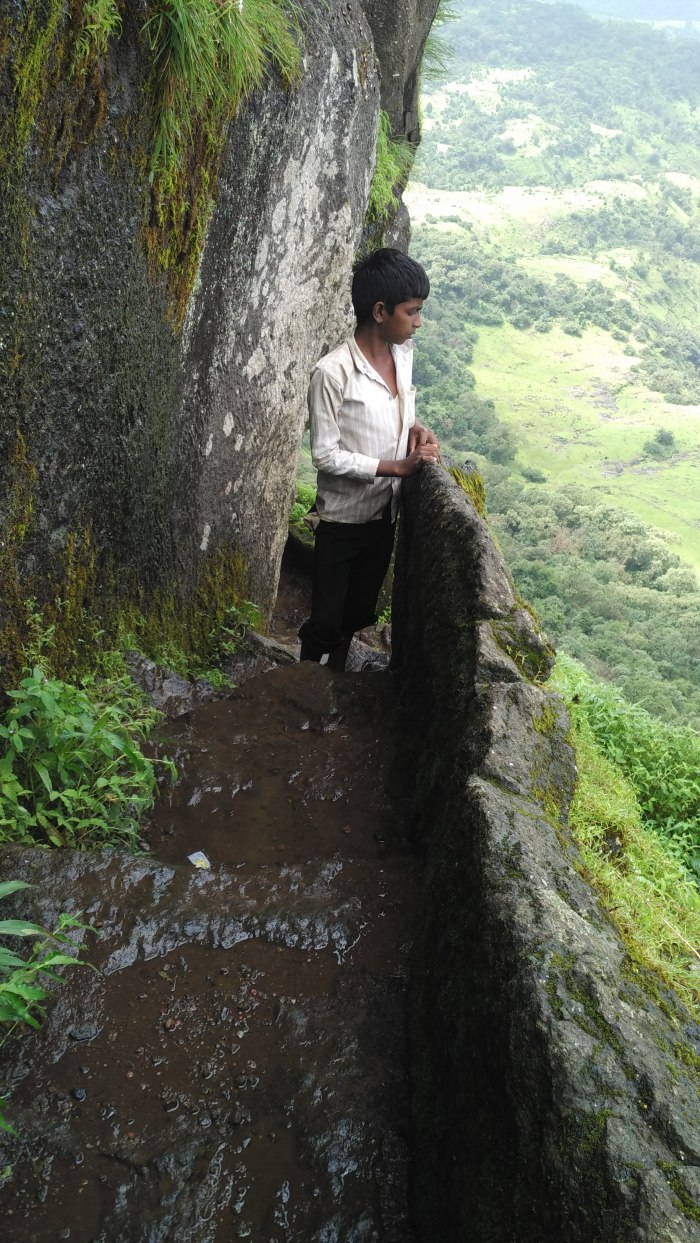
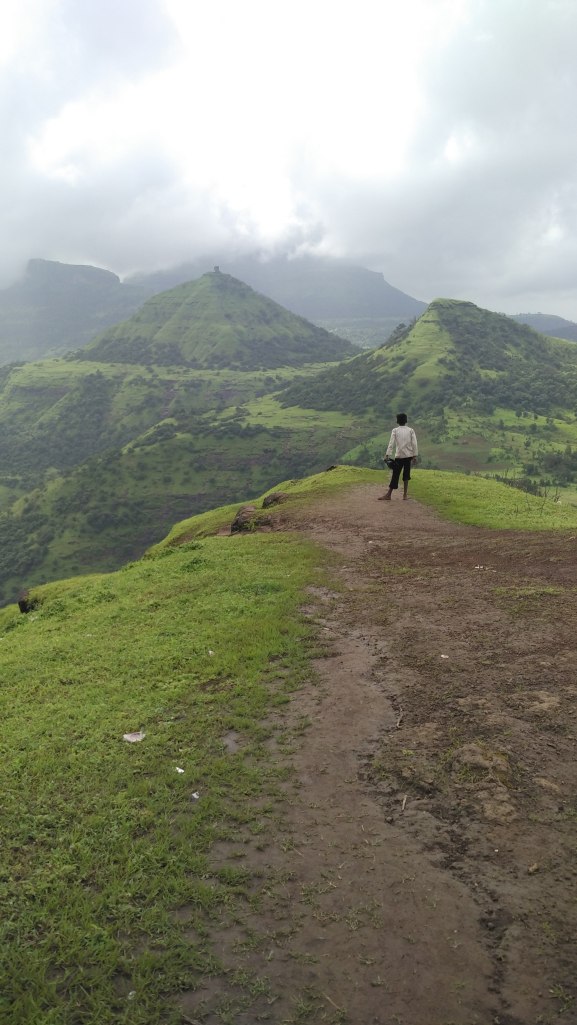
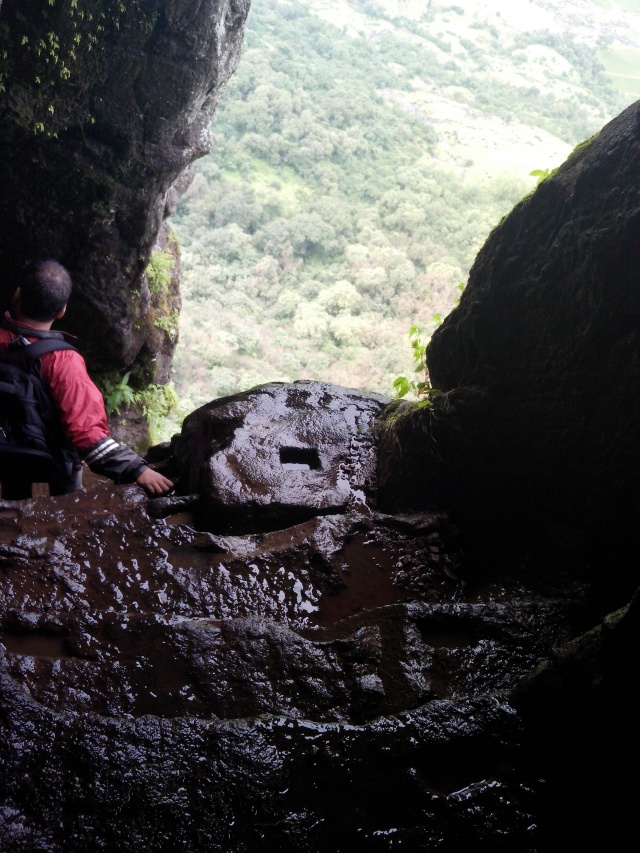
Started for the second phase, it was kind of indoor but still layout is such that you can see the valley beneath and it was so steep and very challenging too. We reached to the spot where there was small idol statue and cut in the big stone, you could see the force of wind and space was so narrow but it was comfortable to stand and enjoy the scenery, no wonder the pictures and selfies were taken, you would always have a creeping though at the back of your mind saying you came this high but how would you go back down :). There is a lane rounding the pick, we went through it, some local village young girls were coming down and made fun of us how much we were slow and cautious with every step. One of them told us that there was not a single accident on this spot, it was hard to believe but thought it could be a blessed spot. I wondered why someone needed to make a fort out of this peak and how they were managing it in the past. well finally we went to the very top, you could see the monkeys sitting on the very edge. There was a small Hanuman temple, we prayed for keeping us safe so far.

IMG_20150831_152019

IMG_20150831_134722 IMG_20150831_134351 IMG_20150831_132638
IMG_20150831_135132 One thing I wanted to mention, in these survival situations you do not at all mind muddy ground or muddy water on you skin, spoiling your cloths, you really see how everything gels together. Well then the descending was even more challenging especially when you do not want to look down into the deep valley and still want to step down on to the so narrow stair steps. It was really freaking experience. At one spot the step is missing you really need to stretch your leg to reach to the correct stair, but we managed it.

IMG_20150831_135546

IMG_20150831_154532

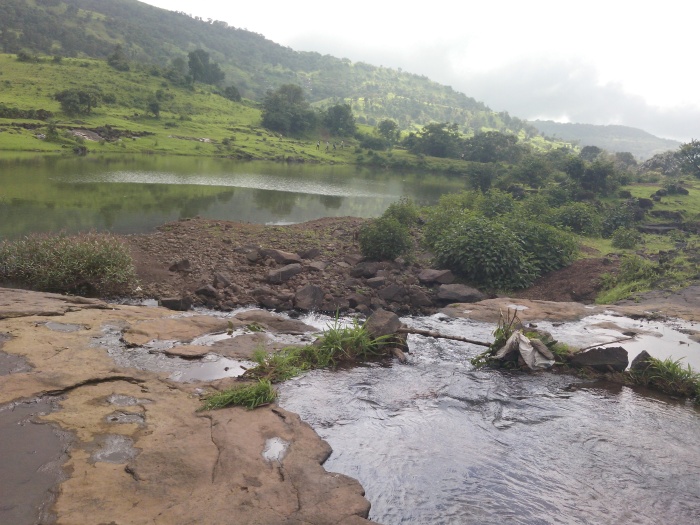
Well when we came down, we took cold water bath in the icy water stream, hmm later we found there is no commutation available to get back to Trimbak , we had to wait nearly an hour when one of the villager was ready to take us to Kumbh Mela. Till then we enjoyed the friendly tea and peace and tranquillity of the greenly village atmosphere.IMG_20150831_163140

IMG_20150831_163140

IMG_20150831_155558

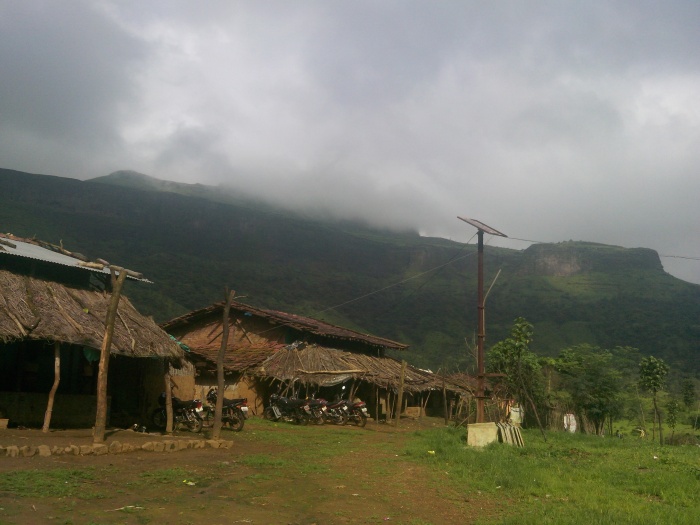
It was not even a village, just the 5-6 houses and could see how simple life was for those guys. One wondered how the kids there would survive in the mad world out there. The return journey was on a motor bike. The villager gave us a ride with we three guys on a small bike. Thanked God, without that ride don’t know how we would have gotten back. End of the day we were so tired. But it was an amazing fulfilling day!!! We were very happy!!

If you think you want to experience something THRILLING, then you must visit this fort!!!

IMG_20150831_142947


EPPlus, Great Library to work with Excel in Dot Net

EPPlus is an open source .NET library. It is so good when you want to read and write Excel files (2007/2010), it makes life easy in a fast paced development requirement. I would like to give brief introduction to the developers who don’t know about it.

The Office Interop is NOT supported by MS in “server-like scenarios” like Citrix. It throws automation exceptions. I am not going into much detail there. But once you have EPPlus then there is no need to install Excel component.

Refer the link http://epplus.codeplex.com/ and download the library binaries.

In the example code below, I am creating a new excel file using a template excel file. The template file has the columns and styles defined. In the newly created file, I am just pasting the data from second row onwards.Note some of the code here is little crude, sorry about that. (Please ignore)  🙂

Create a C#Dot Net project and add a reference [Project -> Add Reference].

Add the following two lines to your module:

using OfficeOpenXml;
using OfficeOpenXml.Style;

//Writing an Excel file:

FileInfo template = new FileInfo(“T:\\template\\sampletemplate.xlsx”); 
FileInfo newFile = new FileInfo(“T:\\output\\CopiedFile.xlsx”);

using (ExcelPackage xlPackage = new ExcelPackage(newFile, template))
{
      //The new Excel file is not copied, it is still in memory

      //Get the wosksheet called SAMPLESHEET from the new excel file

ExcelWorksheet worksheet = xlPackage.Workbook.Worksheets[“SAMPLESHEET”];

DataTable dt = GetDataTable();

      //The function code not listed and no validation added for the validation

//This populates the excel file, I wanted it to paste the data from column C and //second row

worksheet.Cells[“C2”].LoadFromDataTable(dt, false);

//I know in my code that the excel file has 14 columns, note that the 

 const int startRow = 2;

 int row = startRow;

for (int iCol = 1; iCol < 14; iCol++)
{

        //Change the style of all the cells  for the rows written using a style from a particular cell which had the style set

               for (int iRow = startRow; iRow < (startRow + dt.Rows.Count); iRow++)
              {
                   worksheet.Cells[iRow, iCol].StyleID = worksheet.Cells[startRow, 3].StyleID;
                }

}

      //The template file has more than 10000 rows,  deleting the extra rows and just keeping rows written from datatable.

worksheet.DeleteRow((startRow + dt.Rows.Count), (worksheet.Dimension.End.Row – dt.Rows.Count));

//This will save the file as T:\\output\\CopiedFile.xlsx
xlPackage.Save();

  }

Reading an excel file

using (ExcelPackage xlPackage = new ExcelPackage(existingFile))
{

// get the first worksheet in the workbook
ExcelWorksheet worksheet = xlPackage.Workbook.Worksheets[1];

//Get start and end range values from the excel file.

var start = worksheet.Dimension.Start;
var end = worksheet.Dimension.End;

for (int iRow = 2; iRow <= end.Row; iRow++)
{

string cellval = (string)worksheet.Cells[iRow, 1].Value;
if (string.IsNullOrEmpty(cellval) == false)
{

//Perform required action
}

}

//usage of LINQ – Get all the values from column D, then filter it

var dValues = from cell in worksheet.Cells[“D2:D” + worksheet.Dimension.End.Row.ToString()]
where cell.Value.ToString().Equals(worksheet.Cells[irow, 4].Value.ToString())
select cell;

//Copy range of values from a spreadsheet to another. The code for creating errorworksheet is not given here

worksheet.Cells[string.Format(“C{0}:T{0}”, irow)].Copy(errorworksheet.Cells[string.Format(“C{0}:T{0}”, errrowcnt+2)]);

}


ESB Networks Deploys Intergraph® GIS for Ireland’s Electricity Distribution System

Worked on this fantastic project and its finally Live

The following news comes from the Intergraph’s site – http://www.intergraph.com/assets/pressreleases/2015/06-04-2015a.aspx

Intergraph G/Technology® solution aids in planning, design, construction and operations

HUNTSVILLE, Ala., June 4, 2015 – ESB Networks Ltd., the licensed operator of the electricity distribution system in the Republic of Ireland, has implemented a geographic information system (GIS) built upon Intergraph G/Technology® to support the planning, design, construction and day-to-day operations of Ireland’s electricity distribution network.

The Intergraph GIS serves as a single enterprise solution for the full life-cycle management of ESB Networks’ network assets, improving workflow efficiencies and integrating seamlessly with other business-critical systems. The new system went live this week following a three-year delivery project.

“The delivery of our new GIS system has been a huge team effort from all the parties involved and provides a highly integrated, modern solution which will serve the expanding and challenging requirements of the ESB Networks business over the coming years” said John Gallagher, IT delivery manager, ESB Networks. “We can now face the challenges of the future safe in the knowledge that we have a state of the art and future proofed solution in place.”

An Intergraph customer for 20 years, ESB Networks had previously developed a highly bespoke Intergraph FRAMME-based solution to meet the specific workflows the utility company’s business users required. ESB Networks determined to upgrade to a new G/Technology-based system and contracted Intergraph and its partners, Irish Mapping & GIS Solution Limited (IMGS) and Rolta U.K. Limited in 2012 to deliver the project following a highly competitive procurement process. The selection was based on the Intergraph team’s demonstration of an understanding of the solutions complexity, the ability of the technology to meet the utility company’s requirements and the team’s commitment to deliver.

“The Intergraph team is honored to serve ESB Networks in its efforts to ensure reliable electricity distribution in the Republic of Ireland,” said Alun Pearsey, U.K. country manager, Intergraph Security, Government and Infrastructure (SG&I). “This major enterprise information system implementation is the culmination of a global collaboration and partnership between ESB Networks and its vendor team.”

“IMGS were delighted to support Intergraph in the implementation of a national next-generation GIS for ESB Networks,” said Ciaran Kirk, general manager, IMGS. “This next generation GIS will streamline existing ESB Network workflows and provide unheralded levels of integration between the GIS and ESB’s core business systems to ensure ESB can meet the challenges of providing a smarter 21st century electric grid.”

The solution features Intergraph’s G!NIUS electricity data model with additional customizations to meet the advanced business workflows ESB had configured in FRAMME. Taking advantage of the latest in web services technologies, including Intergraph’s SAP integration module, the project featured a tremendous level of integration, integrating fully with SAP asset, work and customer management systems; Oracle outage management system and Synergee network modeling system. The new Intergraph GIS solution enables ESB Networks to manage the network in three views simultaneously – geographic, geo-schematic and ortho-schematic – through a single system.

Intergraph SG&I helps utilities and communications companies streamline work processes and make smarter decisions. A pioneer in the development and application of location-based technology for more than 45 years, Intergraph SG&I provides solutions to hundreds of utilities and communications customers around the globe, supporting network engineering and operations, customer services and more.

# # #

About Intergraph
Intergraph helps the world work smarter. The company’s software and solutions improve the lives of millions of people through better facilities, safer communities and more reliable operations.

Intergraph Process, Power & Marine (PP&M) is the world’s leading provider of enterprise engineering software enabling smarter design and operation of plants, ships and offshore facilities. Intergraph Security, Government & Infrastructure (SG&I) is the leader in smart solutions for emergency response, utilities, transportation and other global challenges. For more information, visit www.intergraph.com.

Intergraph is part of Hexagon (Nasdaq Stockholm: HEXA B; hexagon.com), a leading global provider of information technologies that drive quality and productivity improvements across geospatial and industrial enterprise applications.

Jim Dobbs
Executive Manager, SG&I
+1.256.730.8558
jim.dobbs@intergraph.com

© 2015 Intergraph Corporation. All rights reserved. Intergraph is part of Hexagon. Intergraph and the Intergraph logo are registered trademarks of Intergraph Corporation or its subsidiaries in the United States and in other countries. CADWorx, CAESAR II, PV Elite and GT STRUDL are registered trademarks, and TANK is a trademark of Intergraph Corporation. Other brands and product names are trademarks of their respective owners.

Rowbound Image in Excel

Often I have found people inserting images in excel but keep them floating instead of making them row bound.

The solution is very simple.

Insert an image and move to the row cell where the image is to be displayed. Adjust the row height/width covering the image.

Right click on the image and from the context menu, click on Format Picture. Chose properties and select Move and size with cells.

tbl


Now the image should be row bound.